Printing with Papercut
Printing from Your Laptop/Desktop
The printing process has changed recently to allow for additional capabilities.
1. All copiers show as the same printer, “437Printers on papercut”.
Print to this.
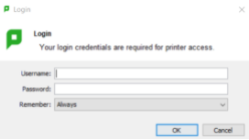
2. The first time you print, you will need to ‘sign-in’, use your district username (usually part of your last and first name, e.g. LASTNFIR, but no @usd437.net) and enter your district email password. This sets all print jobs from your computer under your name.
- Note: Student stations and shared "loaner" devices will prompt for a login every time and will not have the "Remember Always" option depicted in the graphic.
Now print whichever jobs you want to print.
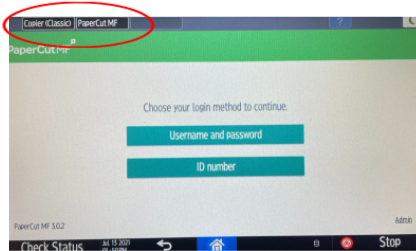
3. At the copier, select “ID Number” and enter your six digit employee number.
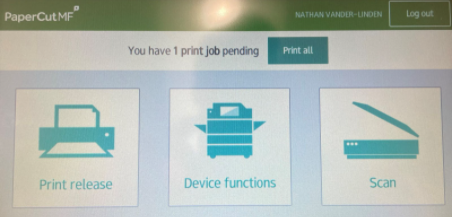
4. After that, you can click either “Print all” or “Print Release” and select which jobs you want to print.
5. Press the “Log out” button in the top right of the copier screen after printing.
Printing from Your ChromeBook
Printing from your ChromeBook is almost identical to printing from your laptop except…
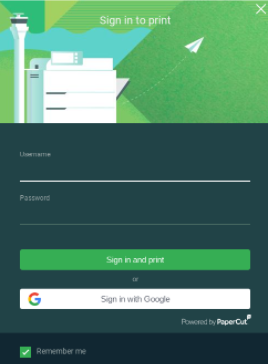
1. When printing from your ChromeBook, you will want to click on sign in with google. Then you can click on your staff email and press accept.
2. At the copier, select “ID Number” and enter your six digit employee number.
3. Then choose to either “Print all” or “Print Release” and select which jobs you want to print.
4. Press “Log out” in the top right of the copier screen.
Making Copies on the New Copiers
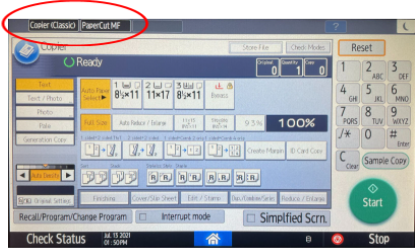
The Copiers have two modes, “Copier (Classic)” and “PaperCut MF”. You can switch between these by pressing the corresponding button in the top of the copier screen.
PaperCut MF is used for printing. If on the PaperCutMF main page and you need to copy, click the Copier (Classic) in the top left corner to change modes.
Copier (Classic) gives you a traditional copier interface to make copies. If you need to print, click the PaperCut MF in the top left corner to change modes.

