Difference between revisions of "Backup Files"
| Line 14: | Line 14: | ||
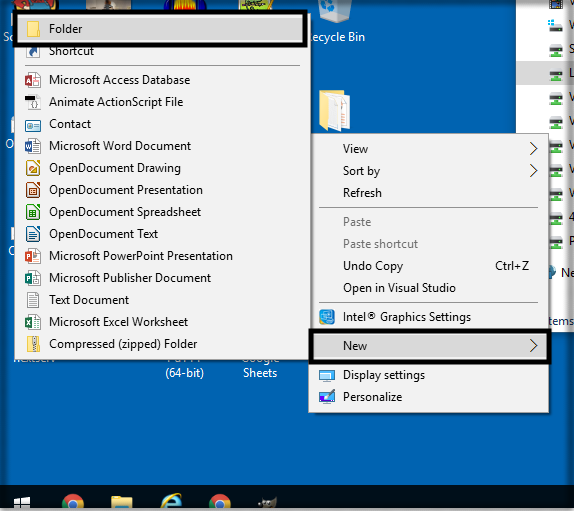
1. The easiest way to backup your files is to move all of the files you need backed up to a single folder and then move the folder over to your "H:" drive. You can move the files individually if you want, but the tutorial will show moving them all at once. First, right-click on the Desktop, then mouse over "New", then click on "Folder". | 1. The easiest way to backup your files is to move all of the files you need backed up to a single folder and then move the folder over to your "H:" drive. You can move the files individually if you want, but the tutorial will show moving them all at once. First, right-click on the Desktop, then mouse over "New", then click on "Folder". | ||
| − | |||
[[File:backup4.png]] | [[File:backup4.png]] | ||
Latest revision as of 14:20, 27 July 2017
How to backup your files to the H: Drive
This article will help you backup files to the "H:" drive to prevent data loss
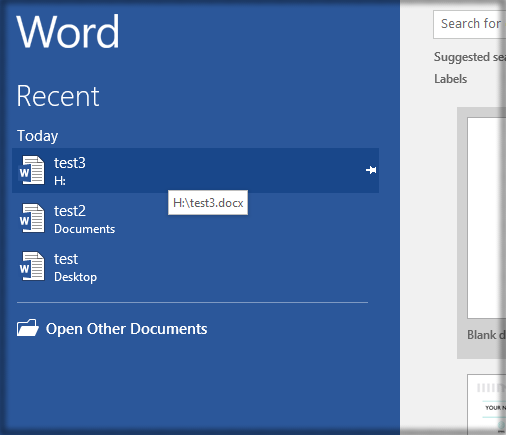
- It's important to note that files are not stored within a program. For instance, when you open a Microsoft Word file you can see that file in the "Recent" documents list in Word, but this is only a shortcut. The file exists on its own, and is loaded by Word for reading and writing. In the image below, you can see the file "test3" shows it is located on the "H:" drive. This means it is stored on the network and would survive a computer failure and be safe over the summer if the file needs to be saved year to year. The file "test2" is stored locally on the computer in the "Documents" folder. This means if you wanted to backup the file, you would need to copy it from the "Documents" folder to your "H:" drive. The file "test" shows the file located on the desktop, which would also need to be saved to the "H:" drive.
*Note: If you access a shared file that is already on a network drive(any drive other than "C:"), you should not move that file onto your "H:" drive. Moving the file will result in a loss of access for other people who may be using it.
1. The easiest way to backup your files is to move all of the files you need backed up to a single folder and then move the folder over to your "H:" drive. You can move the files individually if you want, but the tutorial will show moving them all at once. First, right-click on the Desktop, then mouse over "New", then click on "Folder".
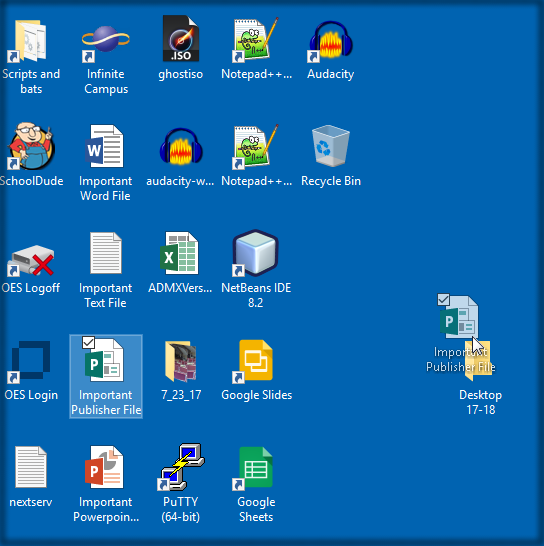
2. Name the folder. From this point you can click and drag your files or other folders containing files into this folder. Your files are not backed up at this point.
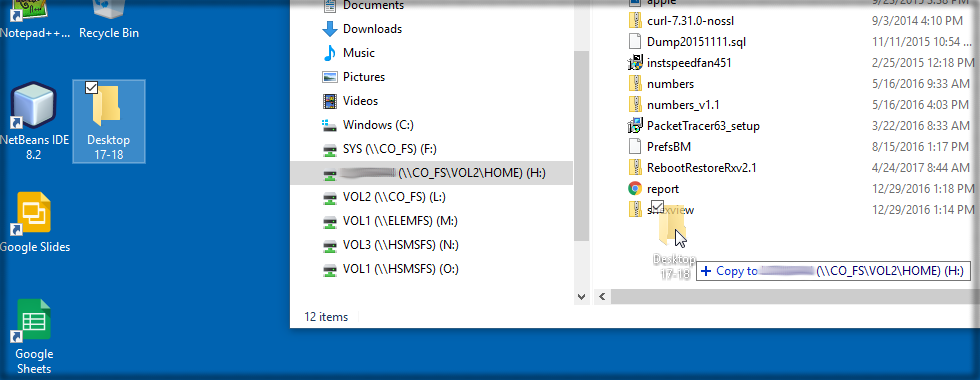
3. Once you have all the files you need backed up loaded into this folder, you can then click and drag the folder into your "H:" drive.
4. To restore your files, simply move the folder back to your local machine. For instance, you could copy the folder back to your desktop. You can also work directly from your "H:" drive with most file types as long as you are connected to the school's network(this would not work from home), including Microsoft Office files, eliminating the need to worry about copying them back and forth.


