Difference between revisions of "Intro to OES"
| Line 7: | Line 7: | ||
'''OES Allows you to access network resources from our internal network.''' | '''OES Allows you to access network resources from our internal network.''' | ||
| − | 1. Click the blue "OES Login" icon on your desktop. Your username will be the first 5 letters of your last name followed by the first three letters of your first name. | + | 1. Click the blue "OES Login" icon on your desktop. Your username will be the first 5 letters of your last name followed by the first three letters of your first name. It is normal for your username to automatically capitalize itself. This means both that your computer is connected correctly to the internal network, and that the username you have entered is a valid username on our system. |
'''''DO NOT''''' ''put @USD437.net on this login.'' | '''''DO NOT''''' ''put @USD437.net on this login.'' | ||
Revision as of 18:30, 24 July 2017
Contents
An Intro to OES (Formerly Novell)
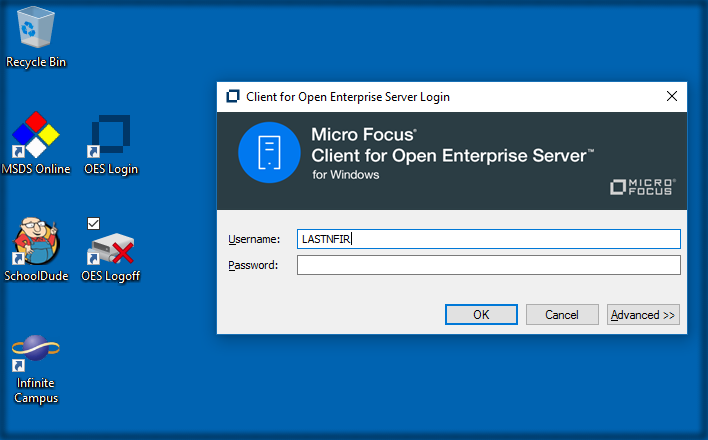
This article refers to a system that used to be called Novell. It was accessed using the icon pictured below.
OES Allows you to access network resources from our internal network.
1. Click the blue "OES Login" icon on your desktop. Your username will be the first 5 letters of your last name followed by the first three letters of your first name. It is normal for your username to automatically capitalize itself. This means both that your computer is connected correctly to the internal network, and that the username you have entered is a valid username on our system.
DO NOT put @USD437.net on this login.
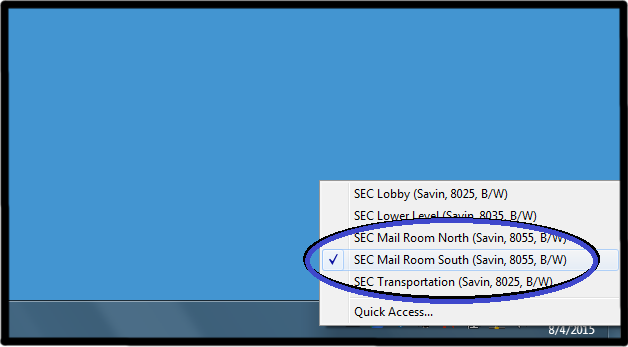
2. Select which printer you would like to print to. In the image below, I’ve selected the printer which happens to be closest to me. The options you have available will differ depending on which building you are assigned. If you don’t have printers appropriate to your building, or if you work in multiple buildings and would like to have other buildings added, please fill out a helpdesk ticket.
Optional
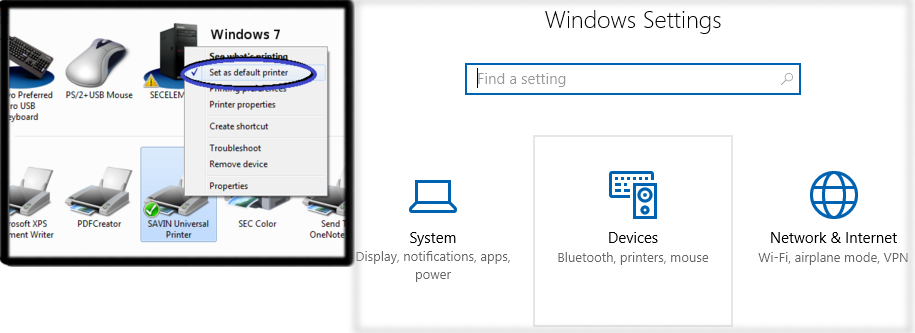
Set Savin Universal as your default printer.
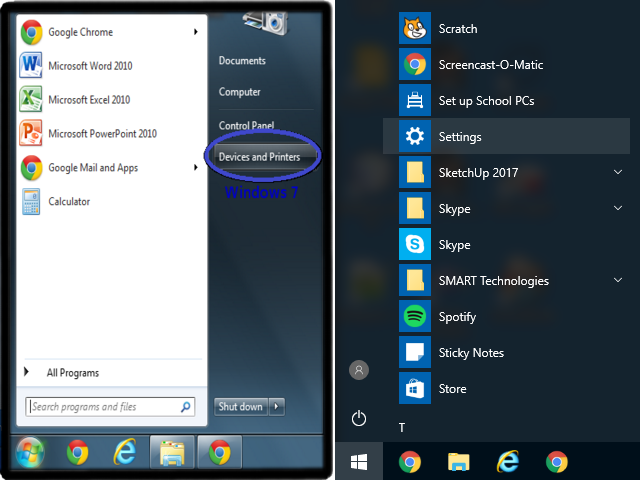
3a. You can also set the printer you’ve selected as your default. To do this in Windows 7 (pictured left), just click on the Start Menu in the lower lefthand corner of your screen, then select “Devices and Printers”. In Windows 10 (pictured right), click on the Start Menu and scroll down to "Settings". If you’re not sure which version of Windows you have, you can compare your computer to the images below.
3b. In Windows 7, once the Printer Selection screen comes up, you’ll need to RIGHT-CLICK on “Savin Universal Printer”. On the menu that pops up, click on “Set as Default Printer”. In Windows 10, click on "Devices".
Additional Steps below for Windows 10 ONLY
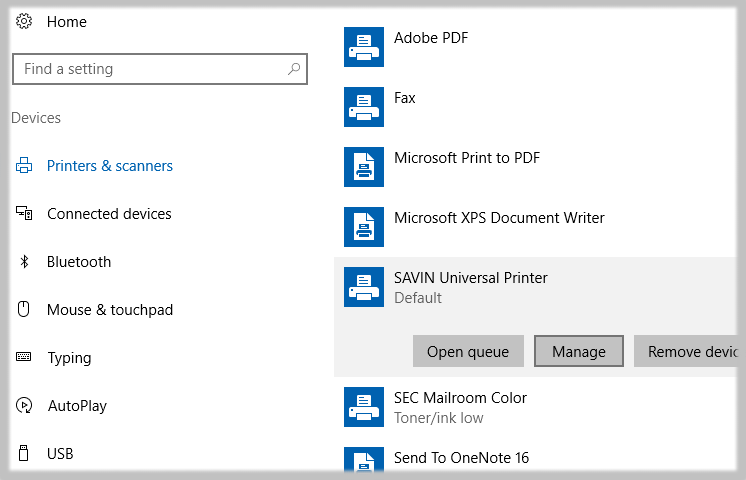
3c. Click on "SAVIN Universal Printer" to reveal additional option buttons. Then click on "Manage". This will open a new window.
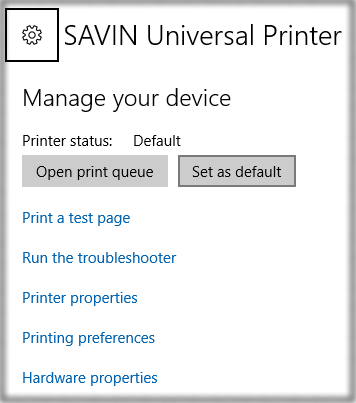
3d. On the new window, click "Set as default", and close the window.
That’s it. You should be all set to print from the printer you’ve selected. If your documents still aren’t printing out where they should, or if you tried to print something before making a selection, please reboot, then check to make sure you clicked on the right option on the PrinterSwitcher as illustrated in steps 1 and 2.

