Difference between revisions of "How-To Take Attendance"
| (12 intermediate revisions by the same user not shown) | |||
| Line 1: | Line 1: | ||
| − | There are 3 ways to take attendance. You can use the | + | There are 3 ways to take attendance. You can use the [[#Attendance - Control Center|Control Center]], [[#Attendance - List View|Attendance in List View]], or [[#Attendance - Seating Chart|Attendance in Seating Chart View]]. |
| − | + | ||
| − | [ | + | |
| − | + | ||
| − | [[Attendance - List View]] | + | |
| − | + | ||
| − | [[Attendance - Seating Chart]] | + | |
== Attendance - Control Center == | == Attendance - Control Center == | ||
| Line 25: | Line 19: | ||
If you want to include a comment you can click on the speech bubble on the students row. A text box will appear. | If you want to include a comment you can click on the speech bubble on the students row. A text box will appear. | ||
| + | |||
| + | [[File:Attendance-Control-Comment.jpg|300px]] | ||
| + | |||
Click Save when you're finished. | Click Save when you're finished. | ||
Please note that if you do not have any options for a student; this means the attendance secretary has already entered information for that student. | Please note that if you do not have any options for a student; this means the attendance secretary has already entered information for that student. | ||
| + | |||
| + | |||
| + | == Attendance - List View == | ||
| + | Click on Attendance in the left hand menu. | ||
| + | |||
| + | [[File:Attendance-List-Menu.jpg|300px]] | ||
| + | |||
| + | |||
| + | The view will default to the last view you used. If needed you can click on Attendance List. | ||
| + | |||
| + | Select the period you're wanting to take attendance for. | ||
| + | |||
| + | You'll see a list of the students along with their picture. To the right of each student will be P, A, and T. By default a student will be marked P for Present. If you have multiple courses taught during the same period you'll see them all listed and separated by course. | ||
| + | |||
| + | [[File:Attendance-List-Single.jpg|300px]] [[File:Attendance-List-Multi.jpg|300px]] | ||
| + | |||
| + | |||
| + | If needed select A for Absent or T for Tardy. | ||
| + | |||
| + | If you want to add any comments there is a comment field to the right for each student. | ||
| + | |||
| + | Click Save when finished. | ||
| + | |||
| + | |||
| + | == Attendance - Seating Chart == | ||
| + | Click on Attendance in the left hand menu. | ||
| + | |||
| + | [[File:Attendance-List-Menu.jpg|300px]] | ||
| + | |||
| + | |||
| + | The view will default to the last view you used. If needed you can click on Seating Chart. Select the period you are wanting to take attendance for. | ||
| + | |||
| + | You'll see the seating chart you set up for the period you selected. If you have multiple courses taught during the same period you should only have 1 seating chart setup. If you setup two seating charts for one period you'll get a message that nothing is available. | ||
| + | |||
| + | [[File:Attendance-SeatingChart-View.jpg|300px]] | ||
| + | |||
| + | |||
| + | Each student's picture will have a P, A, and T. P will be selected by default. | ||
| + | |||
| + | Select A and T for each student as appropriate. | ||
| + | |||
| + | To add a comment click the speech bubble for the student. A text box will appear in a pop up window. | ||
| + | |||
| + | [[File:Attendance-SeatingChart-Comment.jpg|300px]] | ||
| + | |||
| + | |||
| + | Click Save when finished. | ||
Latest revision as of 18:40, 29 August 2019
There are 3 ways to take attendance. You can use the Control Center, Attendance in List View, or Attendance in Seating Chart View.
Attendance - Control Center
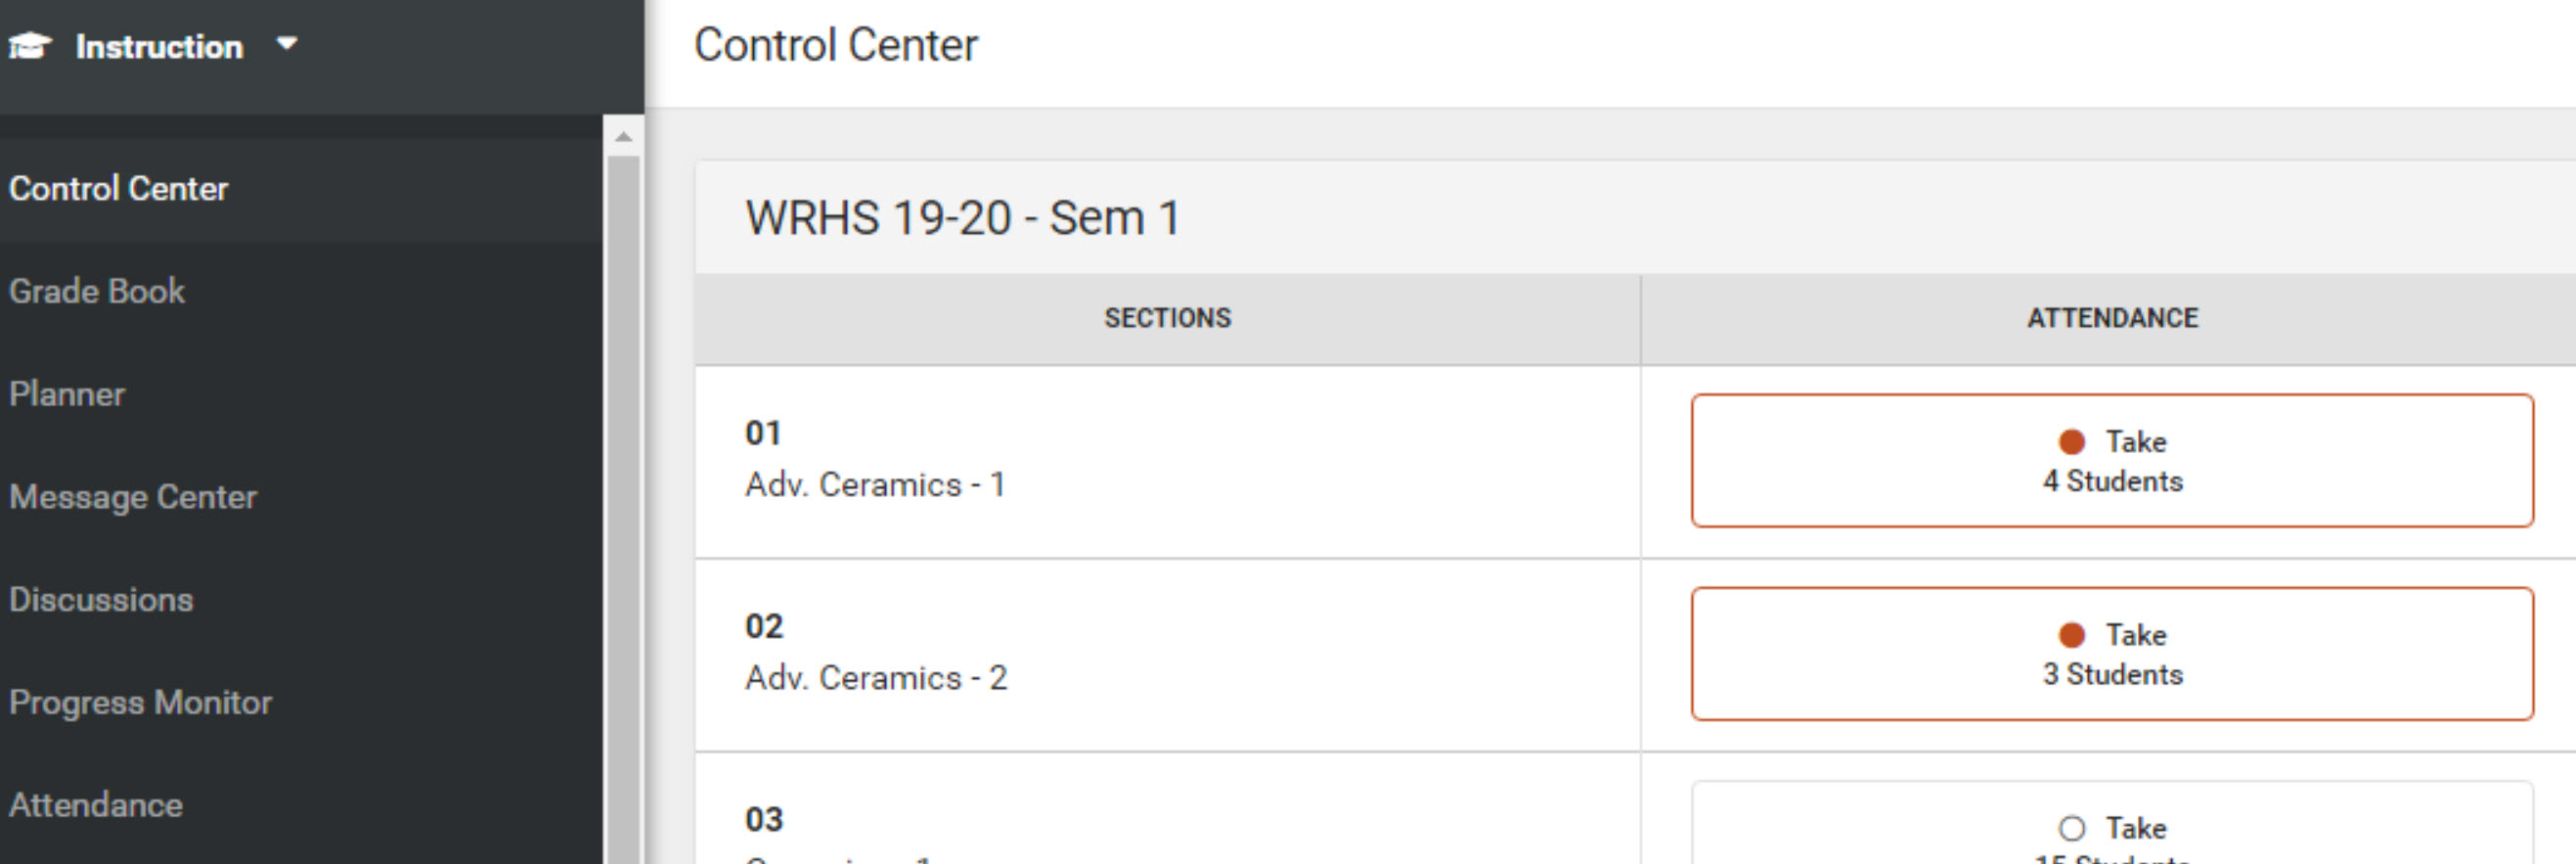
When you log into Infinite Campus and go to Instruction the first page you'll come to is the Control Center. If you have moved away from the Control Center you can return to it by clicking on Control Center at the top of your navigation list on the left hand side of the screen.
Locate the period you are needing to take attendance for and click on the "Take" button under the Attendance column.
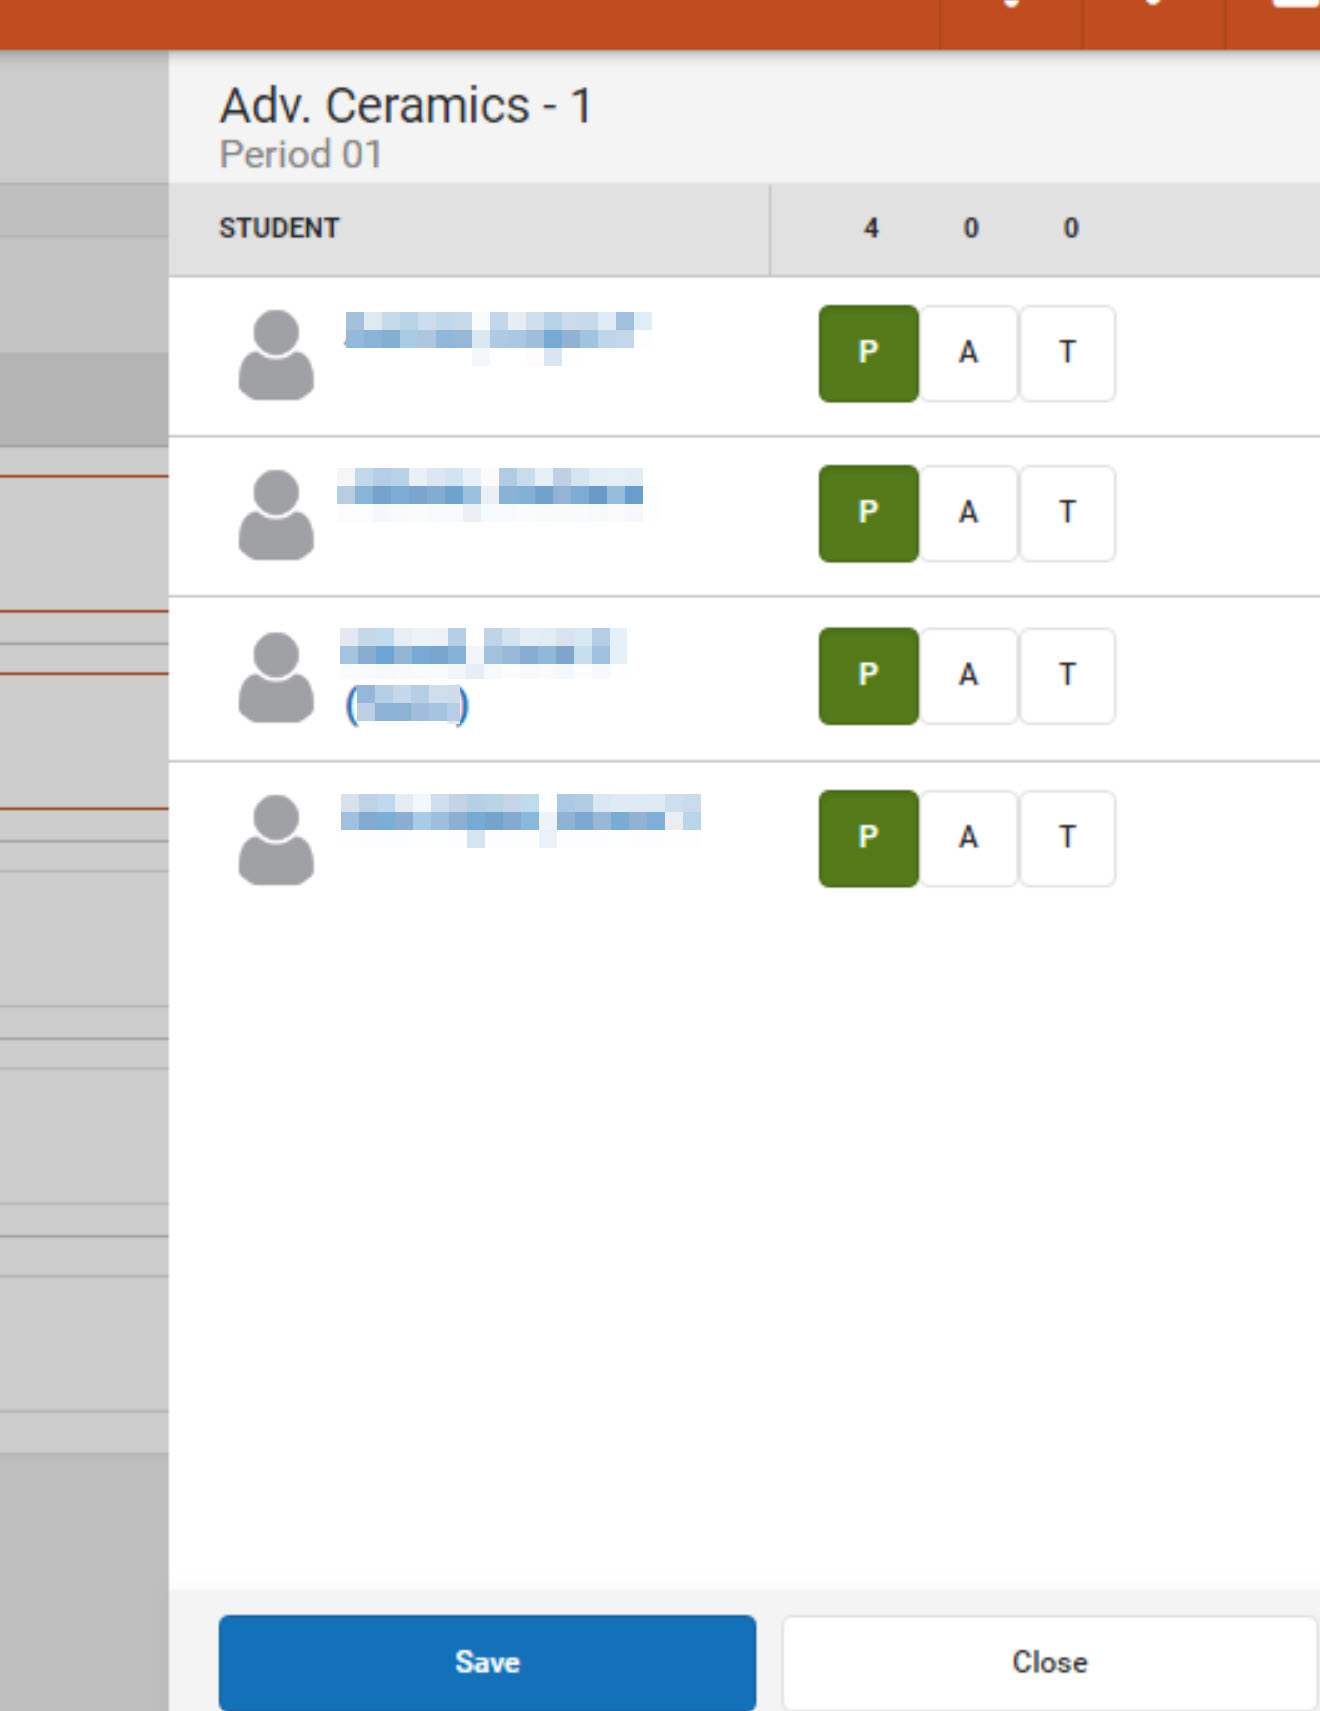
A screen will pop out from the right side of the screen with a list of the students. Each student will have an P, A, or T next to their name. By default P is selected indicating they are present.
If a student is Absent or Tardy select the A or T as appropriate. On this screen the A will turn red and the T will turn yellow when selected.
If you want to include a comment you can click on the speech bubble on the students row. A text box will appear.
Click Save when you're finished.
Please note that if you do not have any options for a student; this means the attendance secretary has already entered information for that student.
Attendance - List View
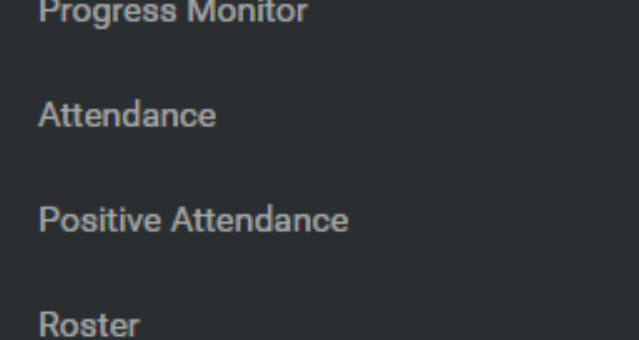
Click on Attendance in the left hand menu.
The view will default to the last view you used. If needed you can click on Attendance List.
Select the period you're wanting to take attendance for.
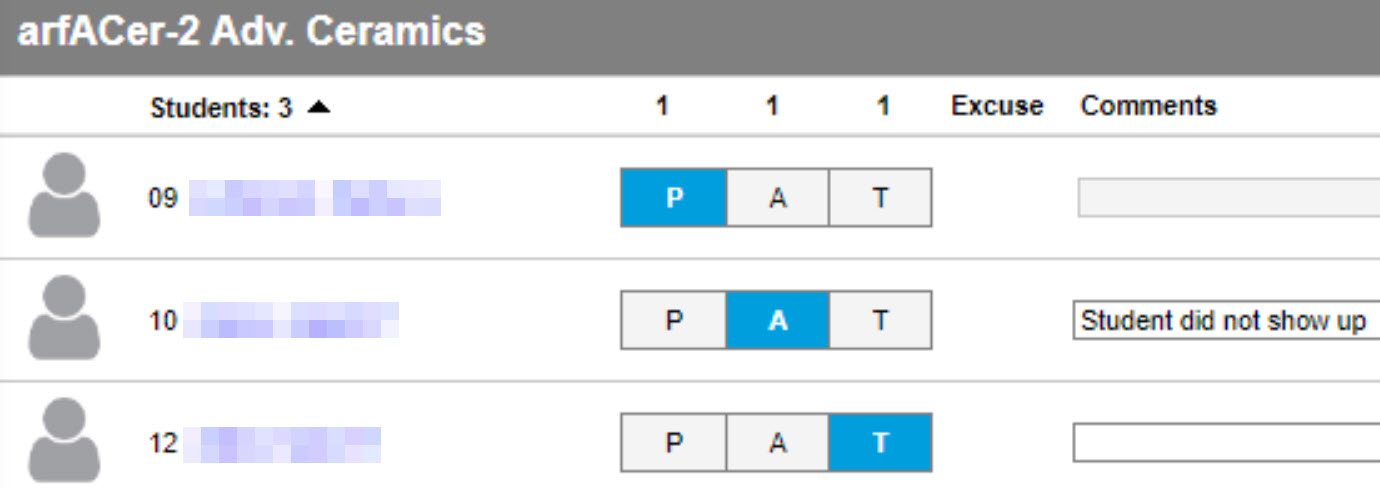
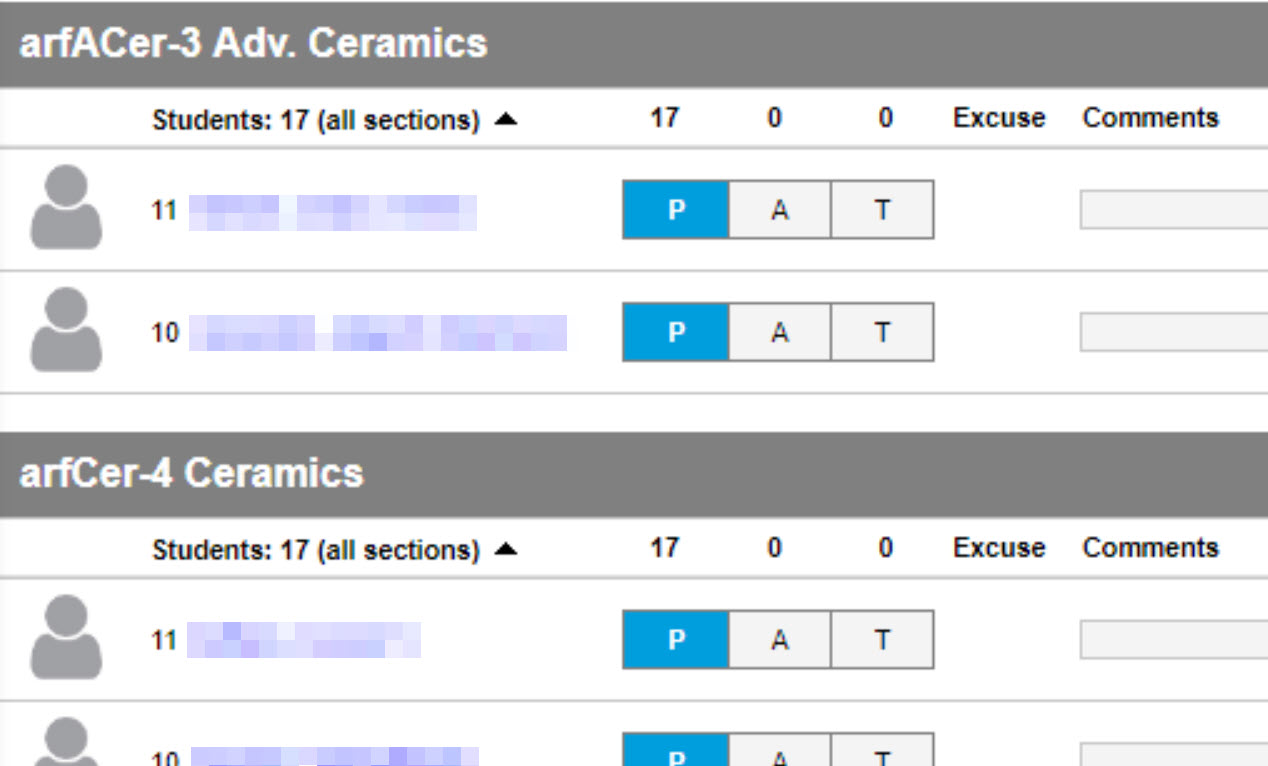
You'll see a list of the students along with their picture. To the right of each student will be P, A, and T. By default a student will be marked P for Present. If you have multiple courses taught during the same period you'll see them all listed and separated by course.
If needed select A for Absent or T for Tardy.
If you want to add any comments there is a comment field to the right for each student.
Click Save when finished.
Attendance - Seating Chart
Click on Attendance in the left hand menu.
The view will default to the last view you used. If needed you can click on Seating Chart. Select the period you are wanting to take attendance for.
You'll see the seating chart you set up for the period you selected. If you have multiple courses taught during the same period you should only have 1 seating chart setup. If you setup two seating charts for one period you'll get a message that nothing is available.
Each student's picture will have a P, A, and T. P will be selected by default.
Select A and T for each student as appropriate.
To add a comment click the speech bubble for the student. A text box will appear in a pop up window.
Click Save when finished.
