Difference between revisions of "How-To Setup Two-Factor Authentication"
(→How to Setup a Second Device) |
|||
| (22 intermediate revisions by the same user not shown) | |||
| Line 7: | Line 7: | ||
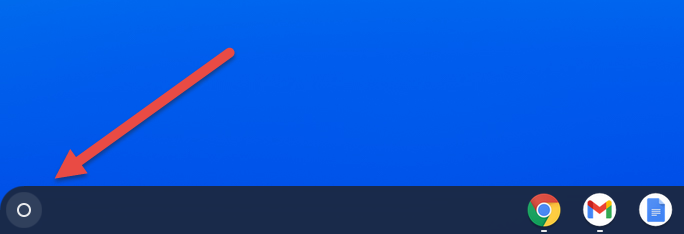
1. Click on the circle in the lower left corner of the screen. | 1. Click on the circle in the lower left corner of the screen. | ||
| + | |||
| + | [[File:2FCBStart.png|300px]] | ||
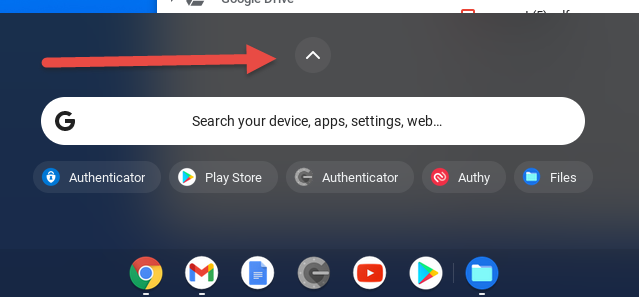
2. Click on the up arrow in the middle of the quick app screen. This will show you all your apps. | 2. Click on the up arrow in the middle of the quick app screen. This will show you all your apps. | ||
| + | |||
| + | [[File:2FCBAppList.png|300px]] | ||
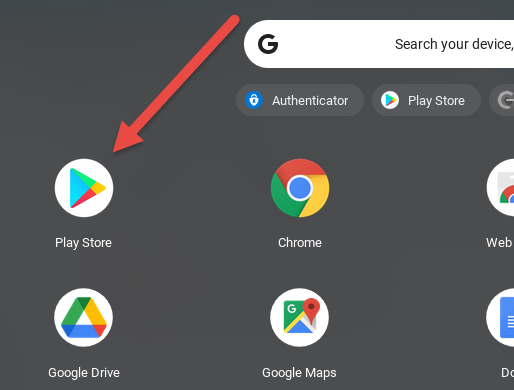
3. Locate and click the Play Store app. | 3. Locate and click the Play Store app. | ||
| + | |||
| + | [[File:2FCBPlayStore.png|300px]] | ||
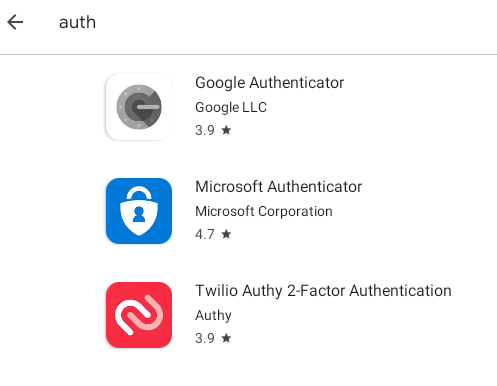
4. Once the Play Store opens, type "auth" in the search bar and click enter. | 4. Once the Play Store opens, type "auth" in the search bar and click enter. | ||
| + | |||
| + | [[File:2FCBPSSearch.png|300px]] | ||
5. You should see three results. Google Authenticator, Microsoft Authenticator, and Twilio Auth 2-Factor Authentication. Click once on the one you prefer to use. | 5. You should see three results. Google Authenticator, Microsoft Authenticator, and Twilio Auth 2-Factor Authentication. Click once on the one you prefer to use. | ||
| − | 6. Once selected you will need to click the Install button for the app you chose. If you selected the wrong one or changed your mind you can click the back arrow and choose again | + | 6. Once selected you will need to click the Install button for the app you chose. If you selected the wrong one or changed your mind you can click the back arrow and choose again. You can choose to install all three apps and decide which one you prefer later. Only one is needed though. |
| − | + | ||
| + | [[File:2FCBGAInstall.png|300px]] | ||
| + | |||
| + | [[File:2FCBMAInstall.png|300px]] | ||
| + | |||
| + | [[File:2FCBAuthyInstall.png|300px]] | ||
7. Once you've installed the app follow steps 1 & 2 to find the app in your app list. | 7. Once you've installed the app follow steps 1 & 2 to find the app in your app list. | ||
8. You can pin the app to your taskbar (also called the shelf) so it's easily accessible if desired. | 8. You can pin the app to your taskbar (also called the shelf) so it's easily accessible if desired. | ||
| + | |||
8a. Move the mouse arrow to the app as if you're going to select it. | 8a. Move the mouse arrow to the app as if you're going to select it. | ||
| + | |||
8b. Tab the touchpad with 2 fingers at the same time. A quick menu will open. | 8b. Tab the touchpad with 2 fingers at the same time. A quick menu will open. | ||
| + | |||
8c. Select "Pin to Shelf". | 8c. Select "Pin to Shelf". | ||
| + | [[File:2FCBPinShelf.png|500px]] | ||
===Phone=== | ===Phone=== | ||
| Line 42: | Line 59: | ||
| − | == | + | ==Getting Your QR Code or Authentication Key== |
| + | |||
| + | ===Log Into Infinite Campus=== | ||
| + | |||
| + | Everyone should automatically have the 2-Factor Authentication pushed out to their account. When this happens you'll need to follow these steps. | ||
1. Open Google Chrome. Note that if you plan on using the QR code you will need to sign into Infinite Campus on a different device than the one you are setting the app up on. | 1. Open Google Chrome. Note that if you plan on using the QR code you will need to sign into Infinite Campus on a different device than the one you are setting the app up on. | ||
| Line 51: | Line 72: | ||
4. Follow the steps below to setup your chosen authenticator app. | 4. Follow the steps below to setup your chosen authenticator app. | ||
| − | |||
| − | |||
| − | |||
5. Once setup, enter the code provided by the app. You have approximately 30 seconds before the code will change. | 5. Once setup, enter the code provided by the app. You have approximately 30 seconds before the code will change. | ||
6. If desired you can check the box for Recognize this device in the future. This will prevent you needing to enter the code more than once every 24 hours. | 6. If desired you can check the box for Recognize this device in the future. This will prevent you needing to enter the code more than once every 24 hours. | ||
| + | |||
| + | [[File:2FICLogin.png|700px]] | ||
| + | |||
| + | ===How to Setup a Second Device=== | ||
| + | |||
| + | 1. Log into your Infinite Campus account at https://campus.usd437.net | ||
| + | |||
| + | 2. Make sure you're in Campus tools. If you're in Campus Instruction you can switch to Campus Tools by clicking on the Instruction drop-down located at the top of your left-hand navigation. Select Campus Tools from the drop-down. | ||
| + | |||
| + | [[File:2factor-Instruction.jpg]] | ||
| + | |||
| + | 3. Once in Campus Tools go to your left-hand navigation under Index. Select Account Settings. | ||
| + | |||
| + | [[File:2factor-accountSettings.jpg]] | ||
| + | |||
| + | 4. On the Time-based Two-factor Authentication section select Options. | ||
| + | |||
| + | [[File:2factor-Options.jpg]] | ||
| + | |||
| + | 5. On your Chromebook/Phone install an authenticator app. The district recommends Google Authenticator, Microsoft Authenticator, or Twilio Authy 2-Factor Authentication. | ||
| + | |||
| + | 6. Open the app and use it to scan the QR Code provided in Campus. If you are having trouble scanning the code there is also a Text code that can be entered into the app. | ||
| + | |||
| + | [[File:2factor-qr.jpg]] | ||
| + | |||
| + | In Campus check the box for "Enable two-factor authentication" and Save. | ||
| + | |||
| + | The next time you sign into Infinite Campus you will be asked for an authentication code. Open your authentication app and enter the code provided. | ||
| + | |||
| + | [[File:2factor-entercode.jpg]] | ||
==Setting Up Authenticator App== | ==Setting Up Authenticator App== | ||
| Line 67: | Line 115: | ||
2. Click the "Get Started" button. | 2. Click the "Get Started" button. | ||
| − | 3. You will have the option to either Scan a QR Code or Enter a setup key. Choose whichever option you prefer. | + | [[File:2FGAStart.png|300px]] |
| − | + | ||
| + | 3. You will have the option to either Scan a QR Code or Enter a setup key. Choose whichever option you prefer. On the Chromebooks it may be easier to use the setup key, but both are available. | ||
| + | |||
| + | [[File:2FGASelect.png|500px]] | ||
4. Using the Setup Key | 4. Using the Setup Key | ||
| + | |||
4a. Select the "Enter a setup key" option. | 4a. Select the "Enter a setup key" option. | ||
| − | 4b. Enter a name for the account in the "Account name" textbox. Eg. Infinite Campus | + | |
| + | 4b. Enter a name for the account in the "Account name" textbox. Eg. Infinite Campus. | ||
| + | |||
| + | [[File:2FGAAccountName.jpg|500px]] | ||
| + | |||
4c. Enter the code provided in Infinite Campus in the "Your Key" textbox. | 4c. Enter the code provided in Infinite Campus in the "Your Key" textbox. | ||
| + | |||
4d. Click the "Add" button. | 4d. Click the "Add" button. | ||
5. Using the QR Code | 5. Using the QR Code | ||
| + | |||
5a. Select the "Scan a QR Code" option. | 5a. Select the "Scan a QR Code" option. | ||
| + | |||
5b. You may be asked to allow Authenticator to take pictures and record video. Click Allow. | 5b. You may be asked to allow Authenticator to take pictures and record video. Click Allow. | ||
| + | |||
| + | [[File:2FGAAllow.png|400px]] | ||
| + | |||
5c. Position your Chromebook or Phone so the camera is facing the QR code provided in Infinite Campus. If using a Chromebook, this may be most easily done if you fully open the Chromebook so the back of the screen touches the bottom of the Chromebook. | 5c. Position your Chromebook or Phone so the camera is facing the QR code provided in Infinite Campus. If using a Chromebook, this may be most easily done if you fully open the Chromebook so the back of the screen touches the bottom of the Chromebook. | ||
| + | |||
| + | [[File:2FGAQR.jpg|300px]] | ||
| + | |||
5d. The device will automatically scan the QR Code once it's in the red square. | 5d. The device will automatically scan the QR Code once it's in the red square. | ||
| + | |||
5e. The app will automatically save your account as Infinite Campus (username). | 5e. The app will automatically save your account as Infinite Campus (username). | ||
6. Once you've setup your account you will see it listed on the initial screen. There will be a 6 digit number that changes every 30 seconds. The wheel to the right of the number indicates how long until the number changes. | 6. Once you've setup your account you will see it listed on the initial screen. There will be a 6 digit number that changes every 30 seconds. The wheel to the right of the number indicates how long until the number changes. | ||
| + | [[File:2FGACounter.jpg|300px]] | ||
===Microsoft Authenticator=== | ===Microsoft Authenticator=== | ||
| Line 93: | Line 160: | ||
3. Click the "Add account" button. | 3. Click the "Add account" button. | ||
| + | |||
| + | [[File:2FMAAddAccount.jpg|300px]] | ||
4. Select "Other account (Google, Facebook, etc.)". | 4. Select "Other account (Google, Facebook, etc.)". | ||
| − | 5. By default it will enter the QR scan option. If you prefer to type in your code click the link at the bottom of the screen that reads "Or Enter Code Manually". | + | [[File:2FMAAccountType.jpg|300px]] |
| − | + | ||
| + | 5. By default it will enter the QR scan option. If you prefer to type in your code click the link at the bottom of the screen that reads "Or Enter Code Manually". On the Chromebooks it may be easier to use the setup key, but both are available. | ||
| + | |||
| + | [[File:2FMAQR.jpg|300px]] | ||
6. Using the Setup Key. | 6. Using the Setup Key. | ||
| + | |||
6a. Click the "Or Enter Code Manually" located at the bottom of the screen when the QR Code scanner opens. | 6a. Click the "Or Enter Code Manually" located at the bottom of the screen when the QR Code scanner opens. | ||
| + | |||
6b. Enter a name for your account. Eg. Infinite Campus. | 6b. Enter a name for your account. Eg. Infinite Campus. | ||
| + | |||
| + | [[File:2FMAName.jpg|300px]] | ||
| + | |||
6c. Enter the code provided in Infinite Campus in the "Secret Key" textbox. | 6c. Enter the code provided in Infinite Campus in the "Secret Key" textbox. | ||
| + | |||
6d. Click "Finish". | 6d. Click "Finish". | ||
| + | |||
6e. You will be taken to the authenticator list. | 6e. You will be taken to the authenticator list. | ||
7. Using the QR Code. | 7. Using the QR Code. | ||
| + | |||
7a. After selecting "Other account (Google, Facebook, etc.)" the QR scanner will automatically open. | 7a. After selecting "Other account (Google, Facebook, etc.)" the QR scanner will automatically open. | ||
| + | |||
7b. You may be asked to allow the authenticator to take pictures and record video. Click "Allow". | 7b. You may be asked to allow the authenticator to take pictures and record video. Click "Allow". | ||
| + | |||
7c. Position your Chromebook or Phone so the camera is facing the QR code provided in Infinite Campus. If using a Chromebook, this may be most easily done if you fully open the Chromebook so the back of the screen touches the bottom of the Chromebook. | 7c. Position your Chromebook or Phone so the camera is facing the QR code provided in Infinite Campus. If using a Chromebook, this may be most easily done if you fully open the Chromebook so the back of the screen touches the bottom of the Chromebook. | ||
| + | |||
7d. Once it scans you will be taken back to the application list. | 7d. Once it scans you will be taken back to the application list. | ||
8. Once you've setup your account you will see it listed on the initial screen. | 8. Once you've setup your account you will see it listed on the initial screen. | ||
| + | |||
| + | [[File:2FMAInitialScreen.jpg|300px]] | ||
9. Click on the account and you will see a 6 digit number that changes every 30 seconds. The wheel to the left of the number indicates how long until the number changes. | 9. Click on the account and you will see a 6 digit number that changes every 30 seconds. The wheel to the left of the number indicates how long until the number changes. | ||
| + | |||
| + | [[File:2FMACounter.jpg|300px]] | ||
===Twilio Auth 2-Factor Authentication (Authy)=== | ===Twilio Auth 2-Factor Authentication (Authy)=== | ||
| Line 122: | Line 209: | ||
2. The first time using the app you will need to setup an account. | 2. The first time using the app you will need to setup an account. | ||
| − | 3. Enter a phone number, This can be a cell phone or a landline | + | 3. Enter a phone number, This can be a cell phone or a landline. Do <b>NOT</b> use your school's main line. If you want you can use your direct line, but be aware that if your number will change you need to disconnect your account so the next person doesn't have access to it. |
| − | + | ||
4. After entering your number you will be asked how you want to receive your code. If using a landline you'll need to select the phone call option. | 4. After entering your number you will be asked how you want to receive your code. If using a landline you'll need to select the phone call option. | ||
| Line 131: | Line 217: | ||
6. Once your Authy account is created you will be on the accounts list screen. Click the + button to add an account. | 6. Once your Authy account is created you will be on the accounts list screen. Click the + button to add an account. | ||
| − | 7. You will be given the option to scan a QR code or enter a code manually. | + | [[File:2FAuthyAddAccount.jpg|300px]] |
| − | + | ||
| + | 7. You will be given the option to scan a QR code or enter a code manually. On the Chromebooks it may be easier to use the setup key, but both are available. | ||
| + | |||
| + | [[File:2FAuthyQR.jpg|300px]] | ||
8. Using the Setup Key. | 8. Using the Setup Key. | ||
| + | |||
8a. Click the "Enter Code Manually" link. | 8a. Click the "Enter Code Manually" link. | ||
| + | |||
8b. Enter the code provided in Infinite Campus in the "Key" textbox. | 8b. Enter the code provided in Infinite Campus in the "Key" textbox. | ||
| + | |||
| + | [[File:2FAuthyEnterCode.jpg|300px]] | ||
| + | |||
8c. Click Save. | 8c. Click Save. | ||
| + | |||
8d. You'll be asked to pick a logo. Select the one you prefer. | 8d. You'll be asked to pick a logo. Select the one you prefer. | ||
| − | |||
| − | |||
| − | |||
| − | |||
| − | + | [[File:2FAuthyLogo.jpg|300px]] | |
| − | + | ||
| − | + | ||
| − | + | ||
| − | + | ||
| − | + | ||
| − | + | ||
| − | + | 8e. Once you select the logo you will be given the option to set a color. Select the desired color and click "Continue". | |
| − | + | ||
| + | [[File:2FAuthyColor.jpg|300px]] | ||
| + | 8f. Enter a name for your account. Eg. Infinite Campus. | ||
| − | + | [[File:2FAuthyNickname.jpg|300px]] | |
| − | + | 8g. Click "Save". | |
| − | + | 8h. You will be taken back to the application list. | |
| − | + | 9. Using the QR Code. | |
| − | + | 9a. Click the "Scan QR Code" button. | |
| − | + | 9b. You may be asked to allow the authenticator to take pictures and record video. Click "Allow". | |
| − | + | 9c. Position your Chromebook or Phone so the camera is facing the QR code provided in Infinite Campus. If using a Chromebook, this may be most easily done if you fully open the Chromebook so the back of the screen touches the bottom of the Chromebook. | |
| − | + | 9d. Enter a name for your account. Eg. Infinite Campus. | |
| − | + | [[File:2FAuthyNickname.jpg|300px]] | |
| − | + | ||
| − | + | 9e. Click "Save". | |
| − | + | ||
| − | + | 9f. You will be taken back to the application list. | |
| − | + | 10. Once you've setup your account you will see it listed on the initial screen. | |
| − | + | [[File:2FAuthyInitial.jpg|300px]] | |
| − | [[File: | + | 11. Click on the account and you will see a 6 digit number that changes every 30 seconds. The wheel under the number indicates how long until the number changes. |
| + | |||
| + | [[File:2FAuthyCounter.jpg|300px]] | ||
Latest revision as of 15:50, 30 March 2022
Two-Factor Authentication is a common security feature used to add an additional line of protection. Once these steps are completed you will need to have the device you used to log into Infinite Campus. You will need to use your device every 24 hours, if you clear your browser cache/cookies, or if you sign in on a different browser.
Contents
How to Install Authenticator App
Chromebook
1. Click on the circle in the lower left corner of the screen.
2. Click on the up arrow in the middle of the quick app screen. This will show you all your apps.
3. Locate and click the Play Store app.
4. Once the Play Store opens, type "auth" in the search bar and click enter.
5. You should see three results. Google Authenticator, Microsoft Authenticator, and Twilio Auth 2-Factor Authentication. Click once on the one you prefer to use.
6. Once selected you will need to click the Install button for the app you chose. If you selected the wrong one or changed your mind you can click the back arrow and choose again. You can choose to install all three apps and decide which one you prefer later. Only one is needed though.
7. Once you've installed the app follow steps 1 & 2 to find the app in your app list.
8. You can pin the app to your taskbar (also called the shelf) so it's easily accessible if desired.
8a. Move the mouse arrow to the app as if you're going to select it.
8b. Tab the touchpad with 2 fingers at the same time. A quick menu will open.
8c. Select "Pin to Shelf".
Phone
1. Open the Play Store or App Store on your Phone.
2. Search for "Auth".
3. There will be several options. The district recommends Google Authenticator, Microsoft Authenticator, or Twilio Authy 2-Factor Authentication.
4. Select the desired authentication app.
5. Click the Install button.
6. Once the app has been installed, locate it on your phone. You can move it to a different location if desired.
Getting Your QR Code or Authentication Key
Log Into Infinite Campus
Everyone should automatically have the 2-Factor Authentication pushed out to their account. When this happens you'll need to follow these steps.
1. Open Google Chrome. Note that if you plan on using the QR code you will need to sign into Infinite Campus on a different device than the one you are setting the app up on.
2. Log into Infinite Campus.
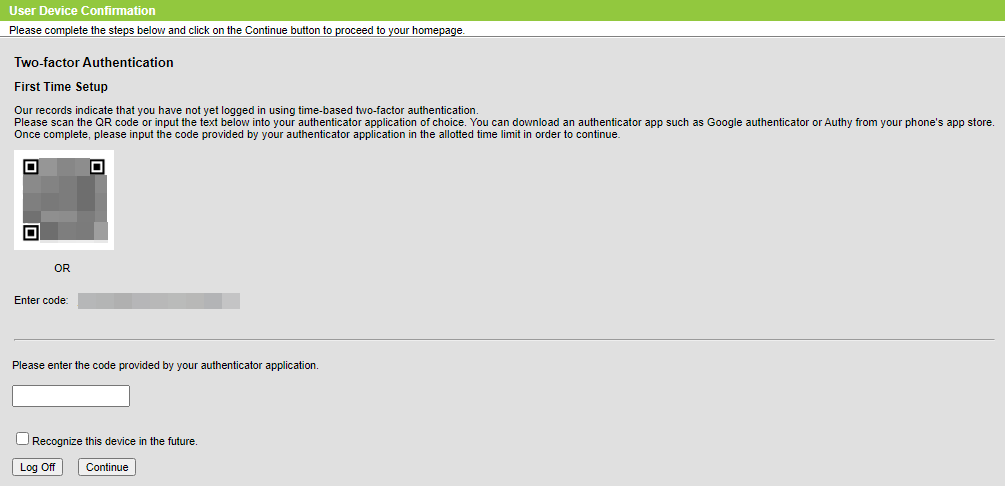
3. You should automatically be prompted to set up your 2 factor authentication.
4. Follow the steps below to setup your chosen authenticator app.
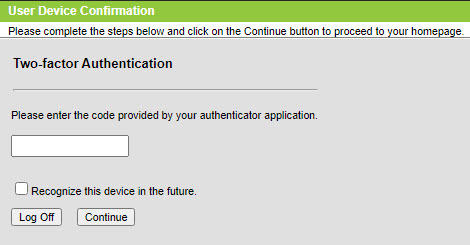
5. Once setup, enter the code provided by the app. You have approximately 30 seconds before the code will change.
6. If desired you can check the box for Recognize this device in the future. This will prevent you needing to enter the code more than once every 24 hours.
How to Setup a Second Device
1. Log into your Infinite Campus account at https://campus.usd437.net
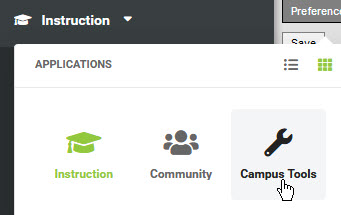
2. Make sure you're in Campus tools. If you're in Campus Instruction you can switch to Campus Tools by clicking on the Instruction drop-down located at the top of your left-hand navigation. Select Campus Tools from the drop-down.
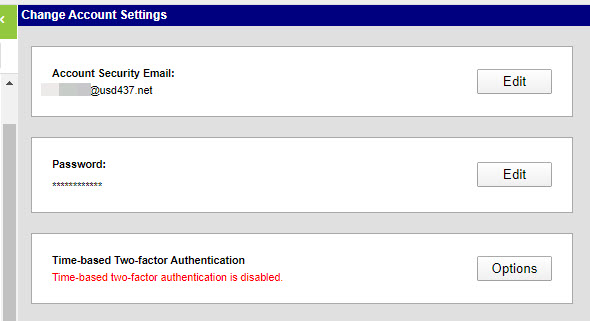
3. Once in Campus Tools go to your left-hand navigation under Index. Select Account Settings.
4. On the Time-based Two-factor Authentication section select Options.
5. On your Chromebook/Phone install an authenticator app. The district recommends Google Authenticator, Microsoft Authenticator, or Twilio Authy 2-Factor Authentication.
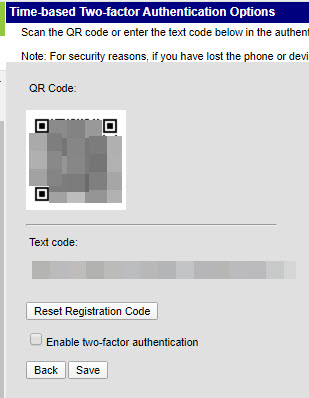
6. Open the app and use it to scan the QR Code provided in Campus. If you are having trouble scanning the code there is also a Text code that can be entered into the app.
In Campus check the box for "Enable two-factor authentication" and Save.
The next time you sign into Infinite Campus you will be asked for an authentication code. Open your authentication app and enter the code provided.
Setting Up Authenticator App
Google Authenticator
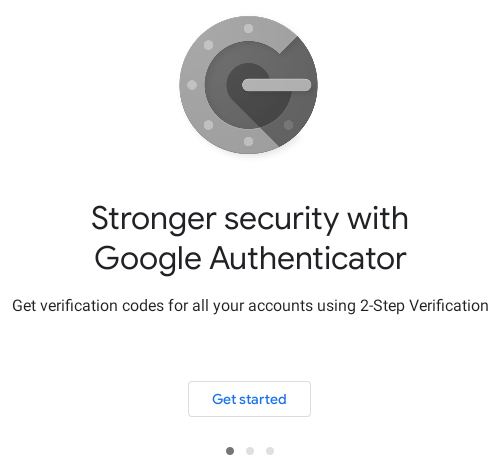
1. Open Google Authenticator.
2. Click the "Get Started" button.
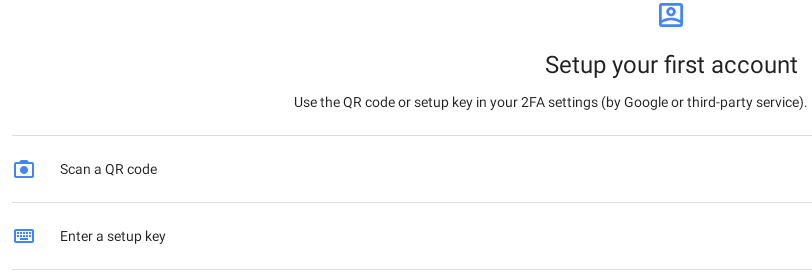
3. You will have the option to either Scan a QR Code or Enter a setup key. Choose whichever option you prefer. On the Chromebooks it may be easier to use the setup key, but both are available.
4. Using the Setup Key
4a. Select the "Enter a setup key" option.
4b. Enter a name for the account in the "Account name" textbox. Eg. Infinite Campus.
4c. Enter the code provided in Infinite Campus in the "Your Key" textbox.
4d. Click the "Add" button.
5. Using the QR Code
5a. Select the "Scan a QR Code" option.
5b. You may be asked to allow Authenticator to take pictures and record video. Click Allow.
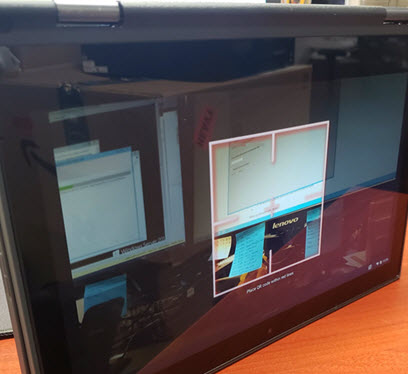
5c. Position your Chromebook or Phone so the camera is facing the QR code provided in Infinite Campus. If using a Chromebook, this may be most easily done if you fully open the Chromebook so the back of the screen touches the bottom of the Chromebook.
5d. The device will automatically scan the QR Code once it's in the red square.
5e. The app will automatically save your account as Infinite Campus (username).
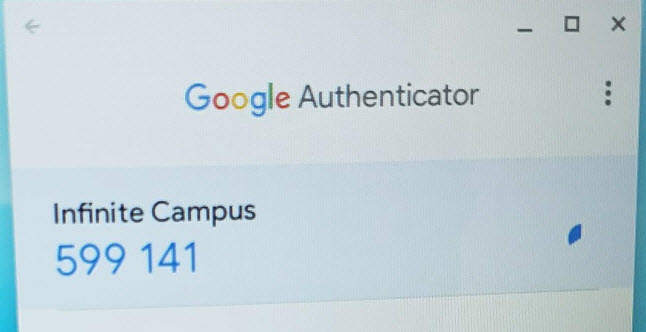
6. Once you've setup your account you will see it listed on the initial screen. There will be a 6 digit number that changes every 30 seconds. The wheel to the right of the number indicates how long until the number changes.
Microsoft Authenticator
1. Open Microsoft Authenticator.
2. You're first time opening the app you will need to agree to the privacy agreement.
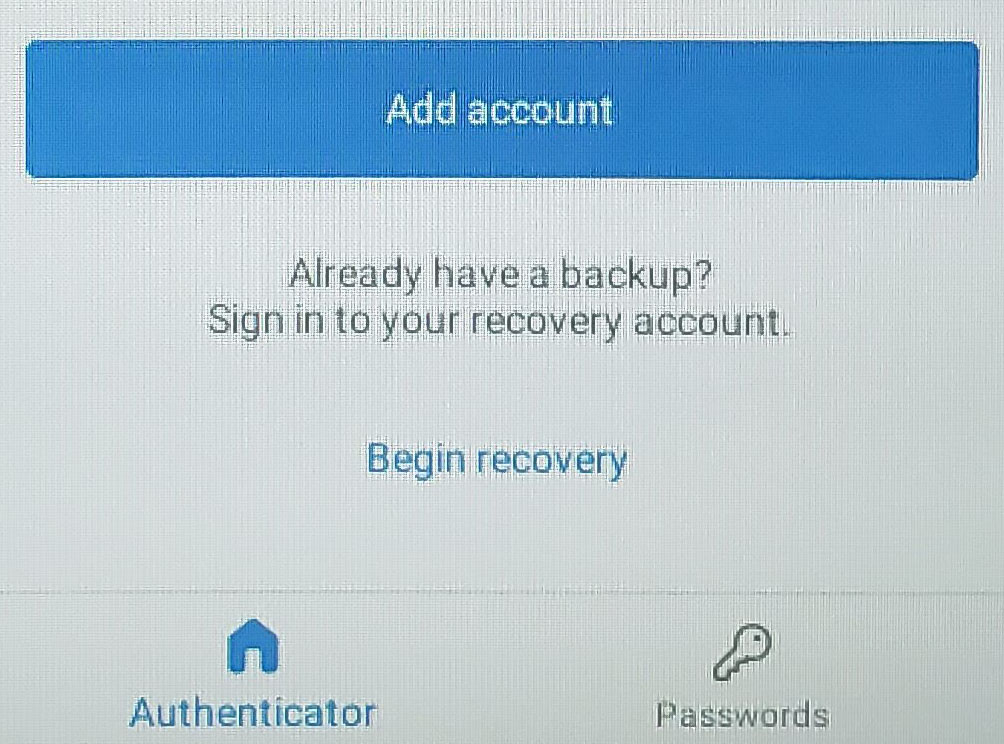
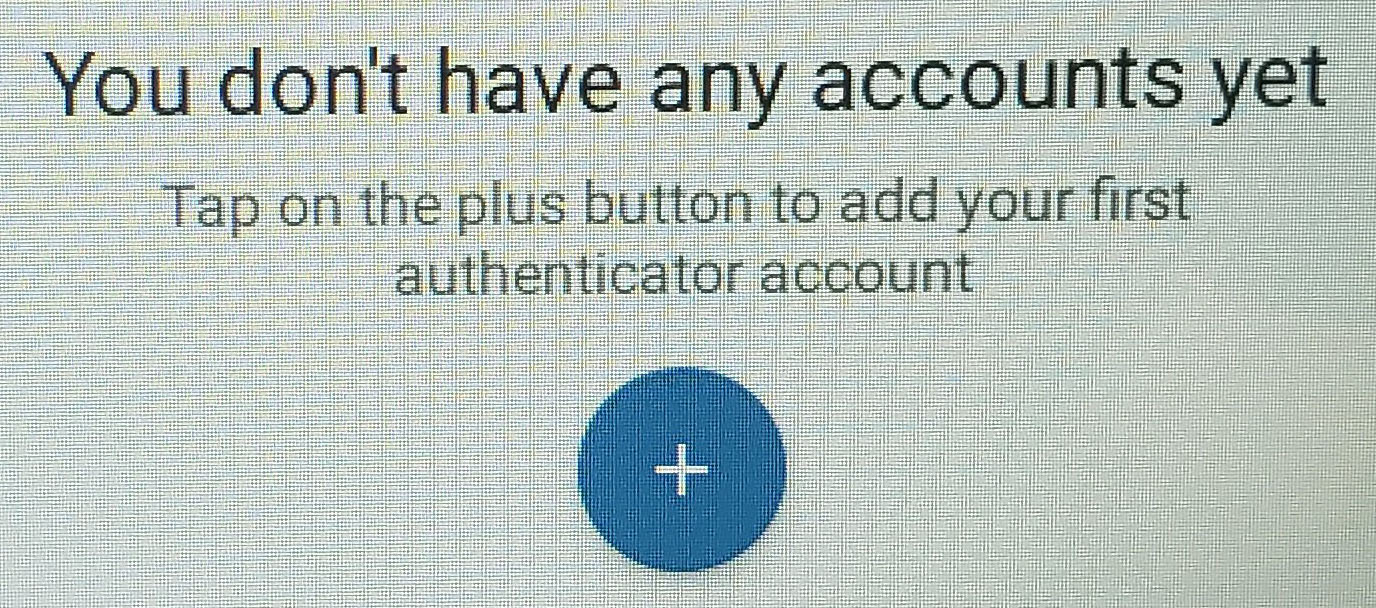
3. Click the "Add account" button.
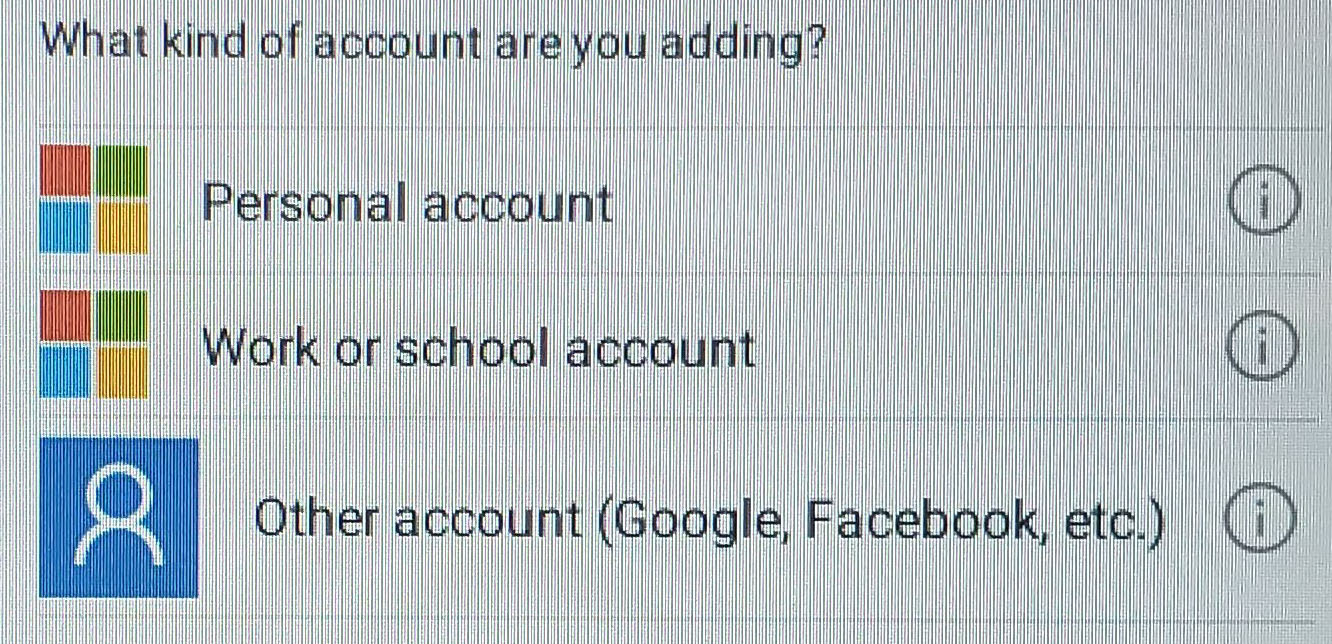
4. Select "Other account (Google, Facebook, etc.)".
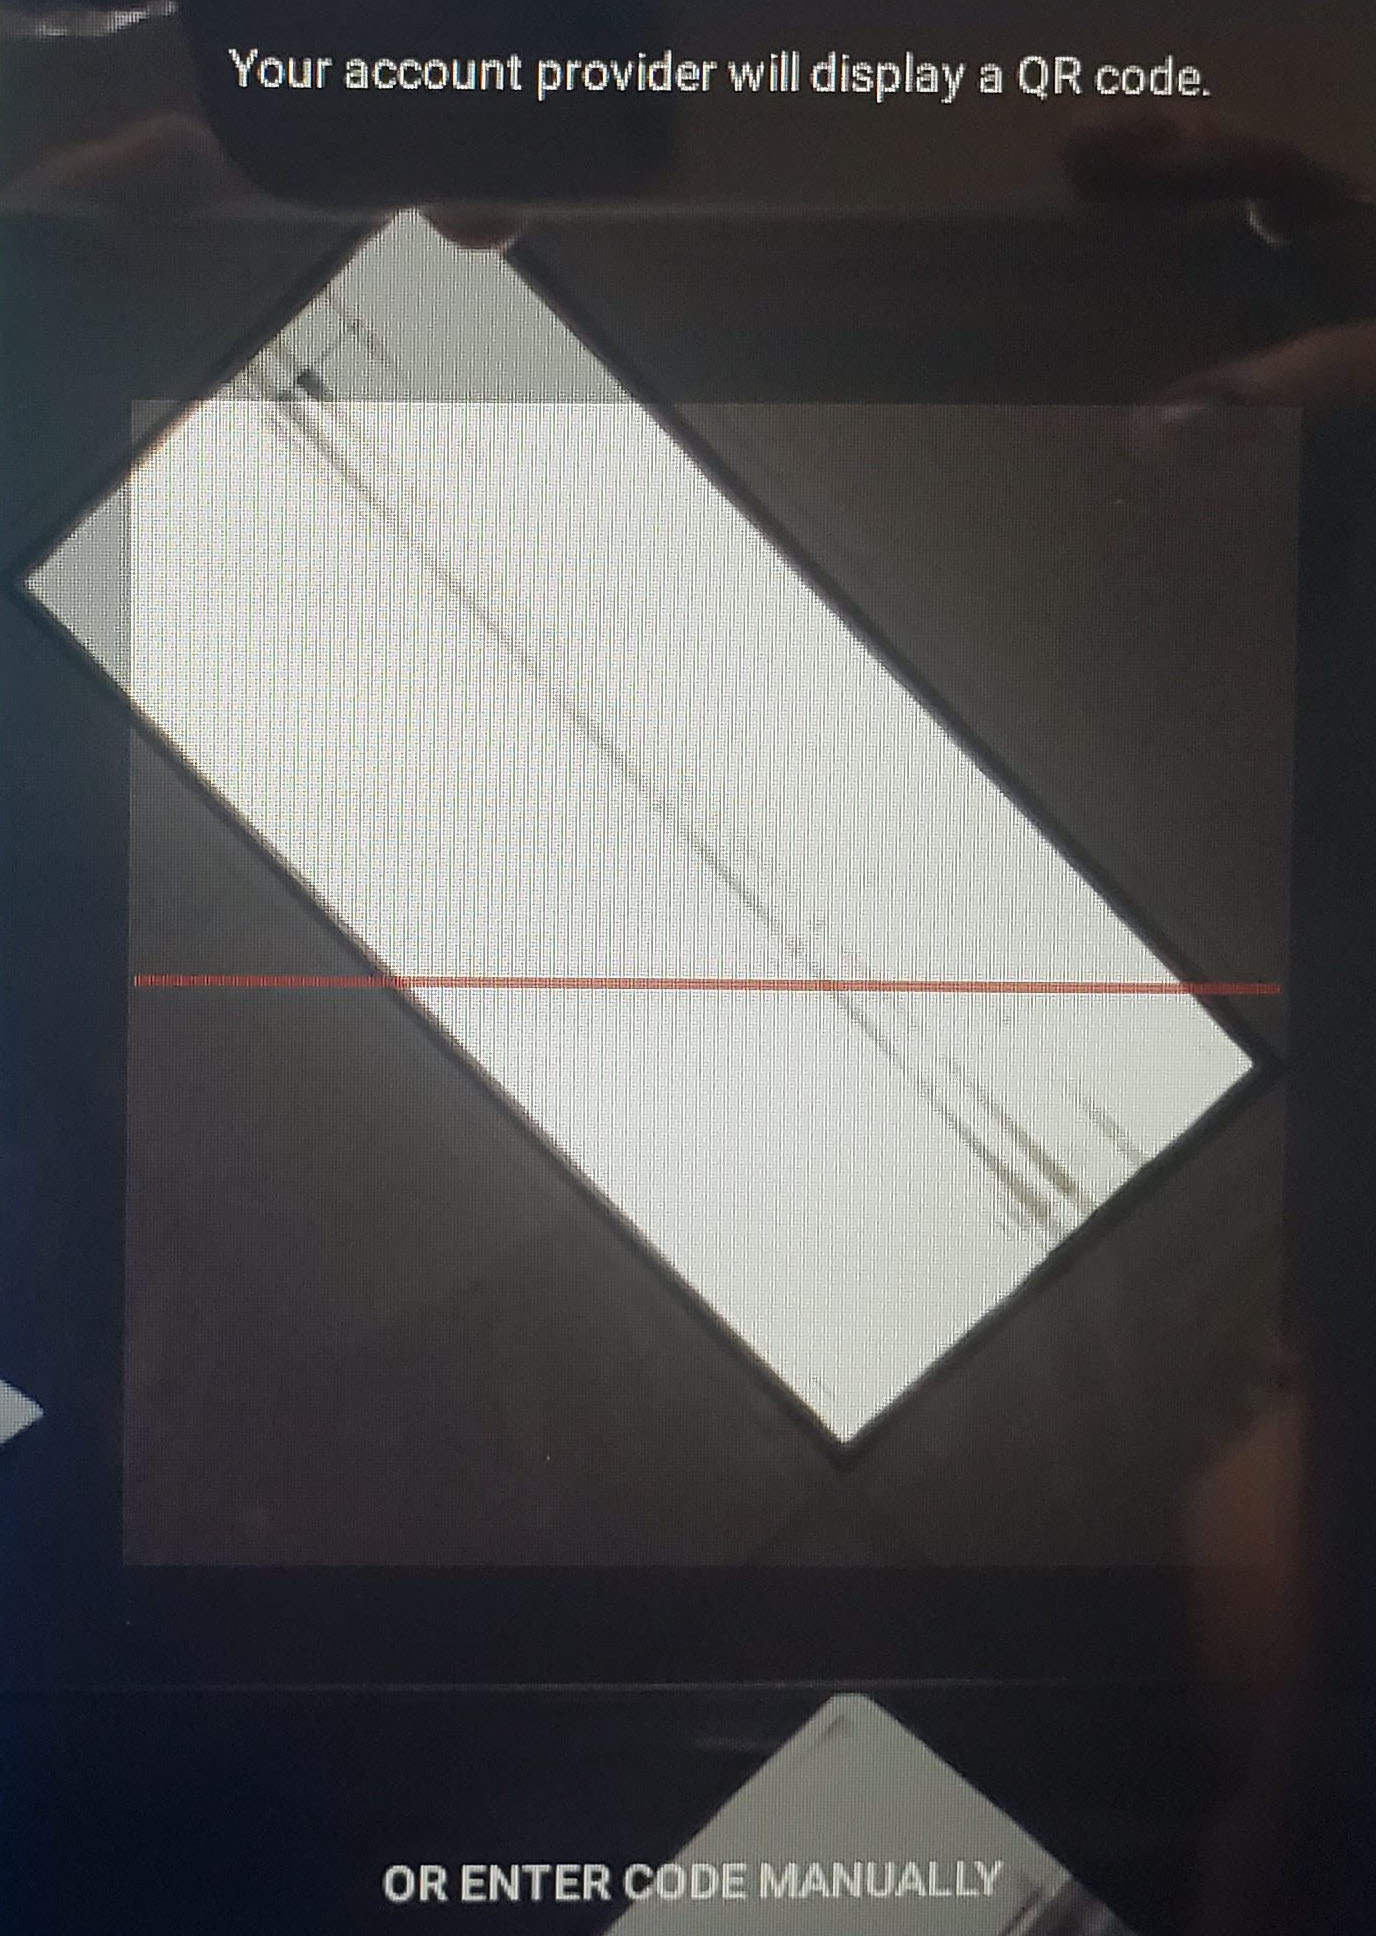
5. By default it will enter the QR scan option. If you prefer to type in your code click the link at the bottom of the screen that reads "Or Enter Code Manually". On the Chromebooks it may be easier to use the setup key, but both are available.
6. Using the Setup Key.
6a. Click the "Or Enter Code Manually" located at the bottom of the screen when the QR Code scanner opens.
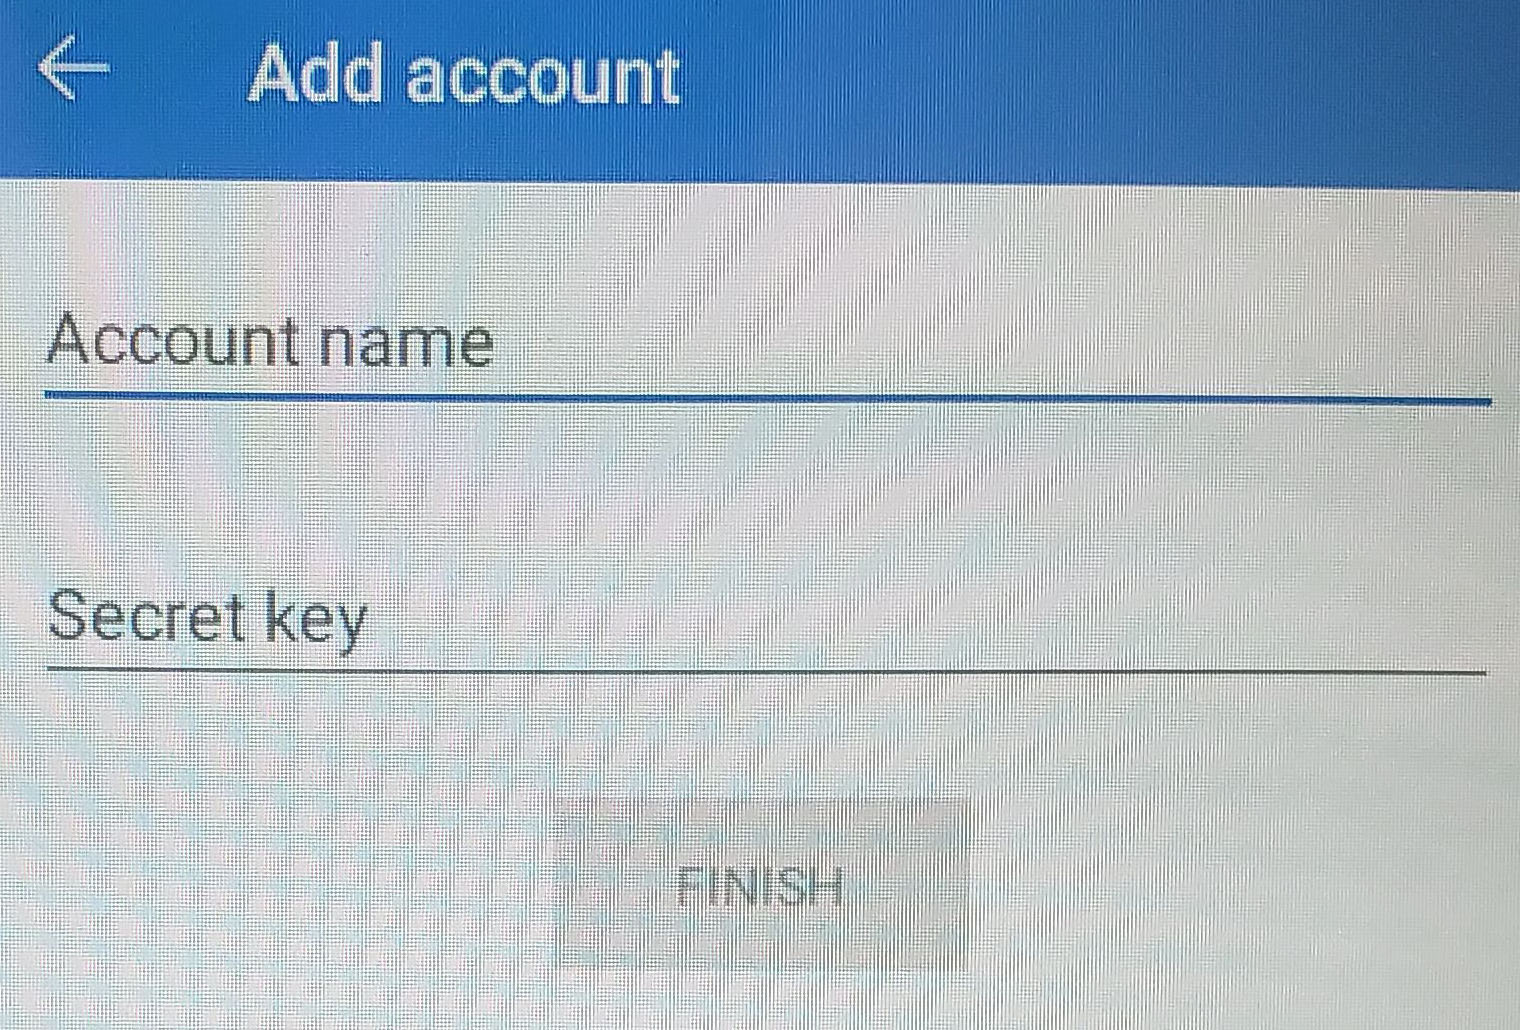
6b. Enter a name for your account. Eg. Infinite Campus.
6c. Enter the code provided in Infinite Campus in the "Secret Key" textbox.
6d. Click "Finish".
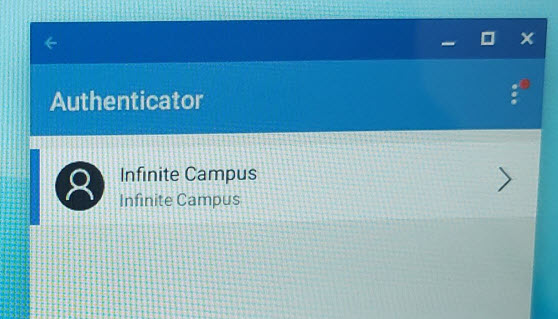
6e. You will be taken to the authenticator list.
7. Using the QR Code.
7a. After selecting "Other account (Google, Facebook, etc.)" the QR scanner will automatically open.
7b. You may be asked to allow the authenticator to take pictures and record video. Click "Allow".
7c. Position your Chromebook or Phone so the camera is facing the QR code provided in Infinite Campus. If using a Chromebook, this may be most easily done if you fully open the Chromebook so the back of the screen touches the bottom of the Chromebook.
7d. Once it scans you will be taken back to the application list.
8. Once you've setup your account you will see it listed on the initial screen.
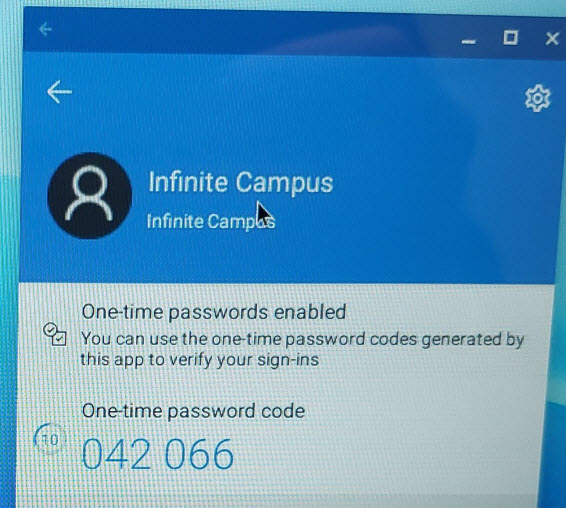
9. Click on the account and you will see a 6 digit number that changes every 30 seconds. The wheel to the left of the number indicates how long until the number changes.
Twilio Auth 2-Factor Authentication (Authy)
1. Open Twilio Auth 2-Factor Authentication, aka Authy.
2. The first time using the app you will need to setup an account.
3. Enter a phone number, This can be a cell phone or a landline. Do NOT use your school's main line. If you want you can use your direct line, but be aware that if your number will change you need to disconnect your account so the next person doesn't have access to it.
4. After entering your number you will be asked how you want to receive your code. If using a landline you'll need to select the phone call option.
5. Enter the code provided.
6. Once your Authy account is created you will be on the accounts list screen. Click the + button to add an account.
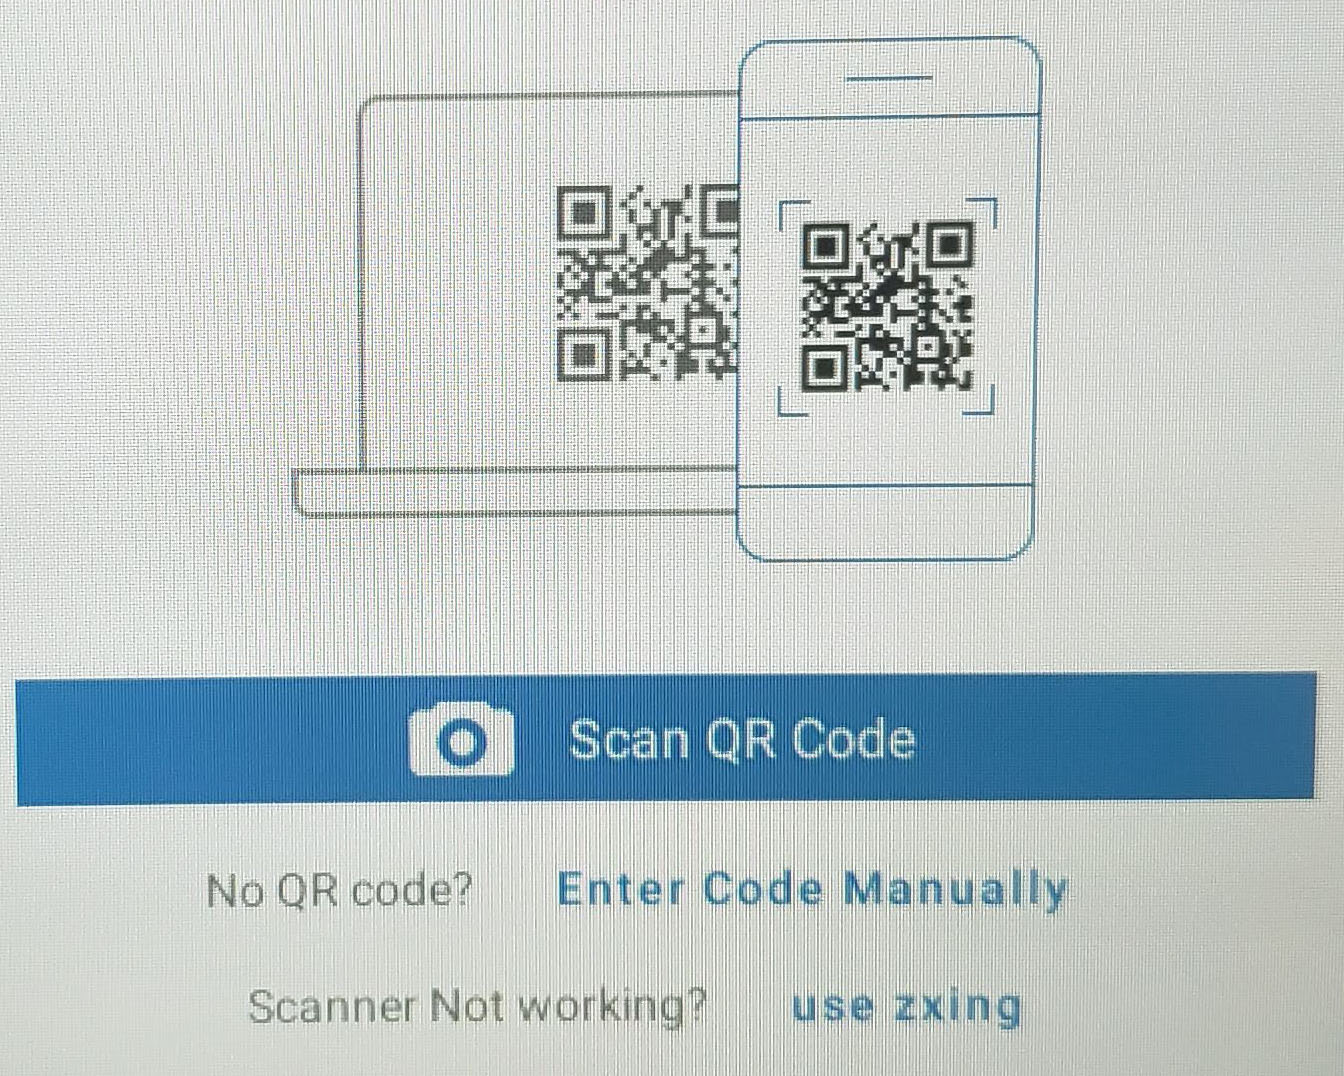
7. You will be given the option to scan a QR code or enter a code manually. On the Chromebooks it may be easier to use the setup key, but both are available.
8. Using the Setup Key.
8a. Click the "Enter Code Manually" link.
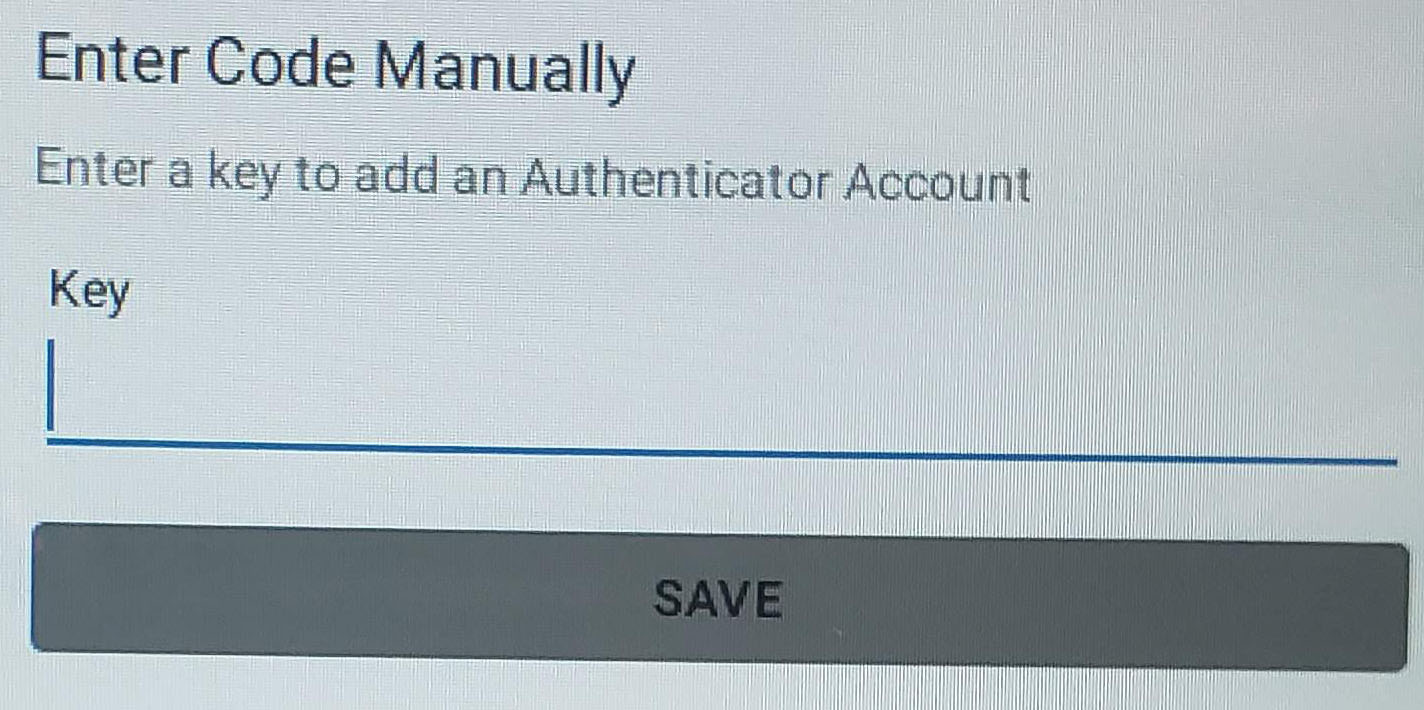
8b. Enter the code provided in Infinite Campus in the "Key" textbox.
8c. Click Save.
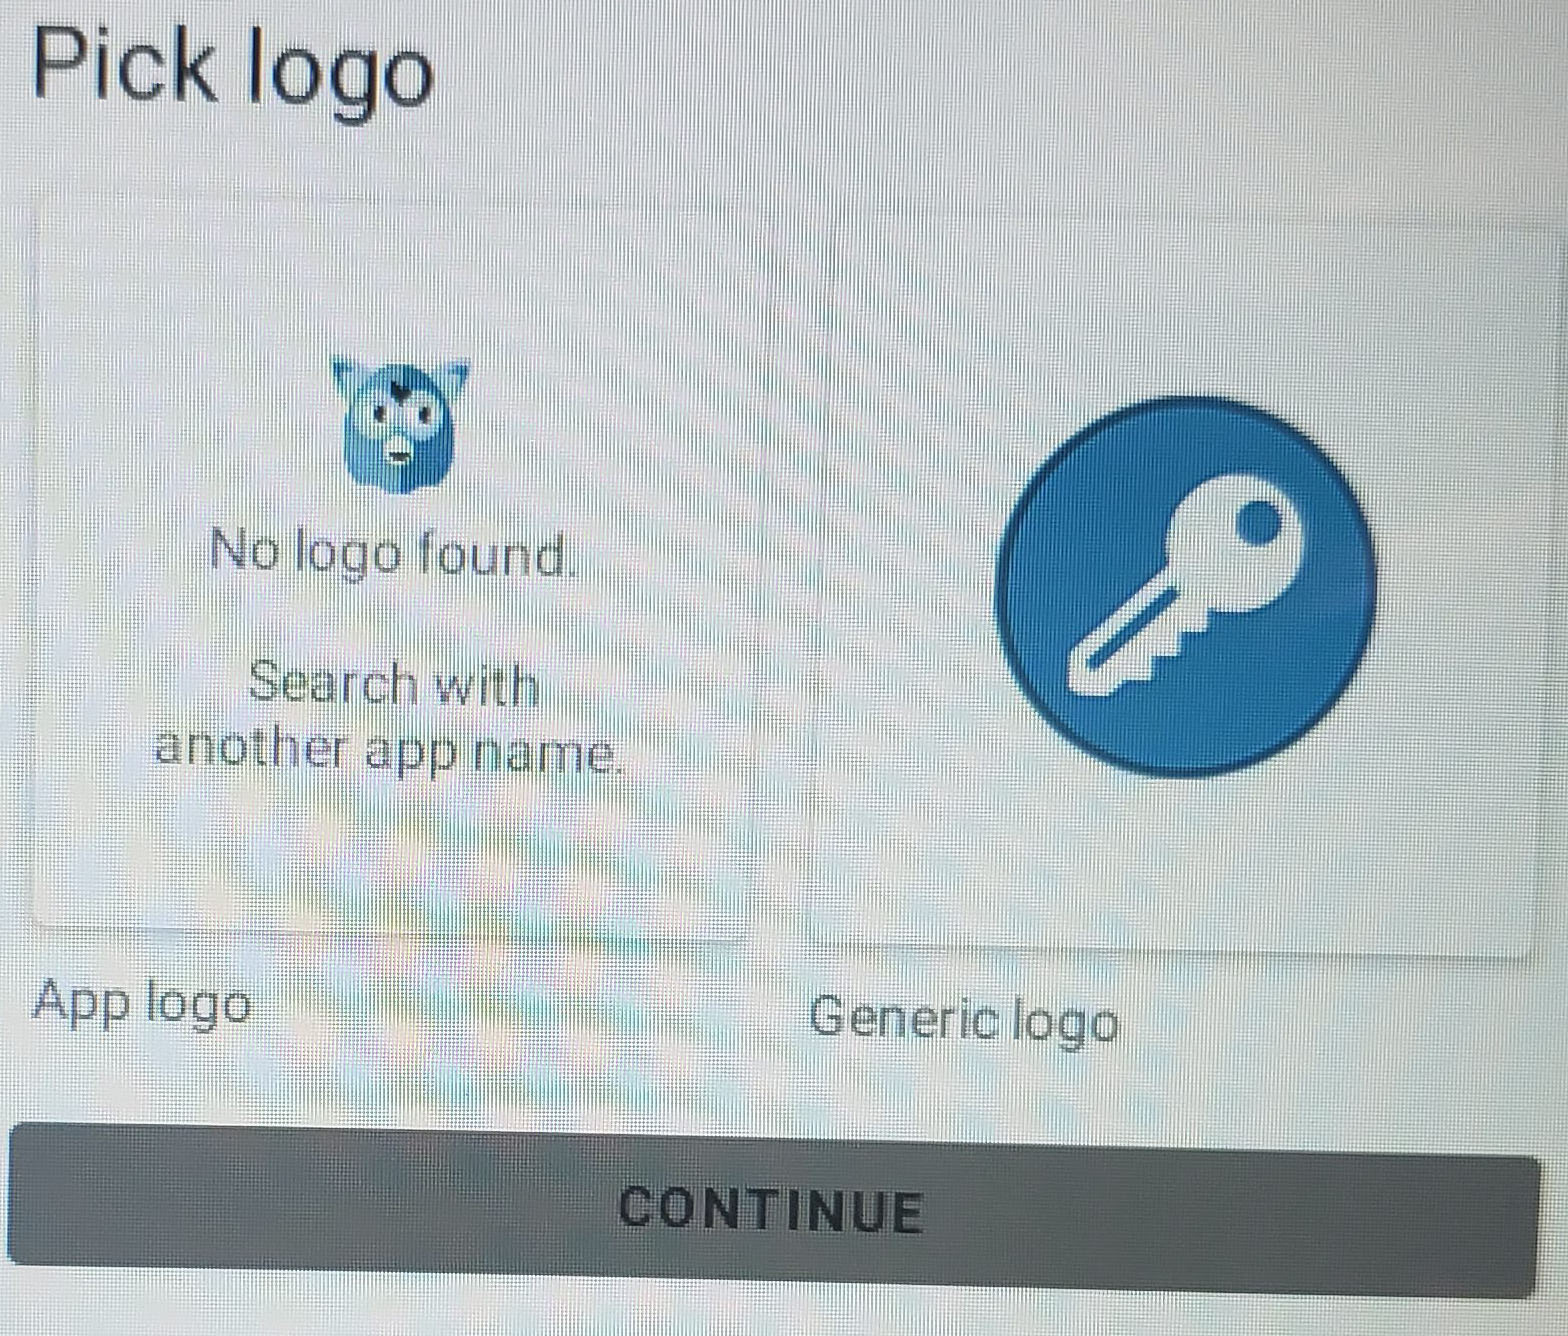
8d. You'll be asked to pick a logo. Select the one you prefer.
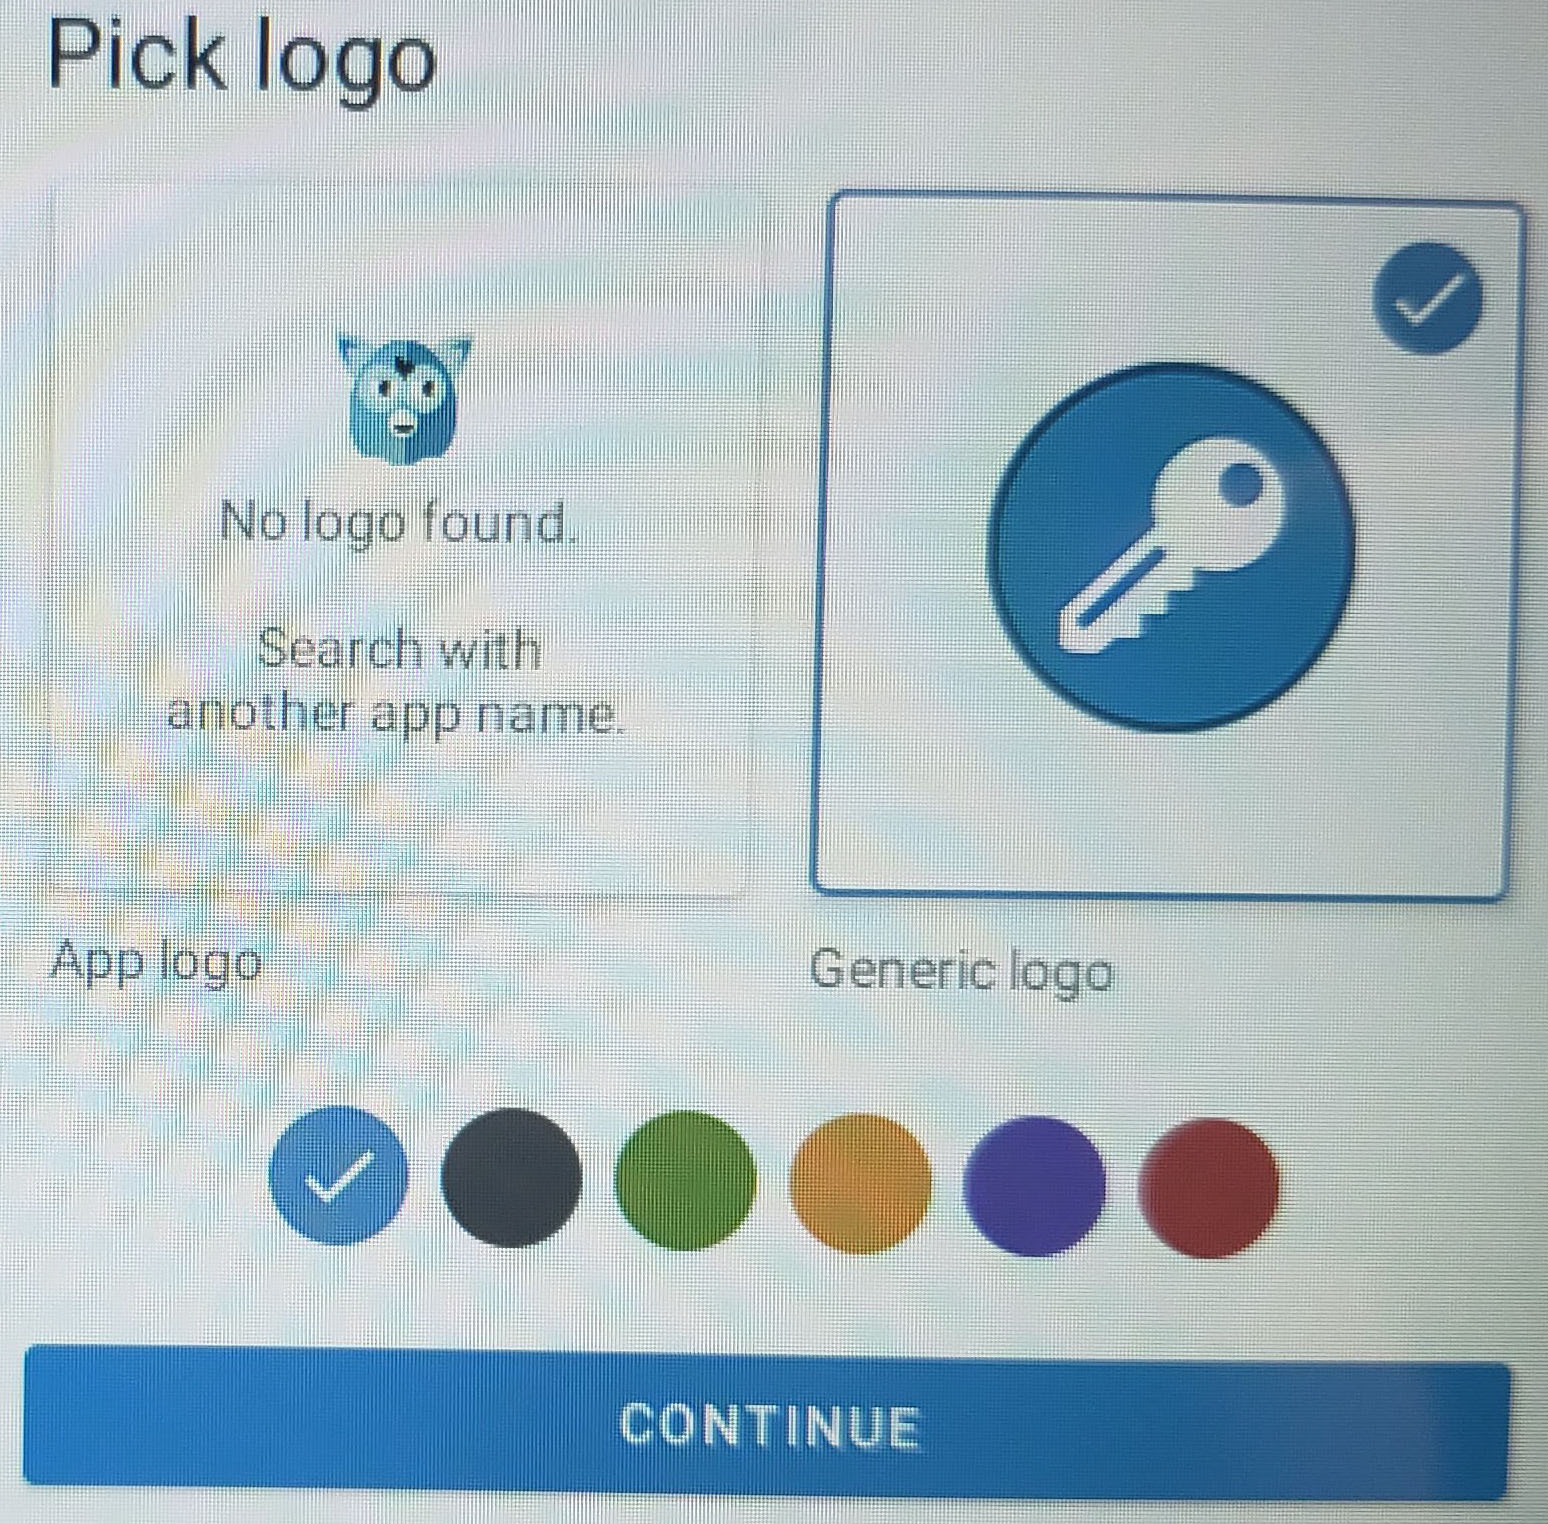
8e. Once you select the logo you will be given the option to set a color. Select the desired color and click "Continue".
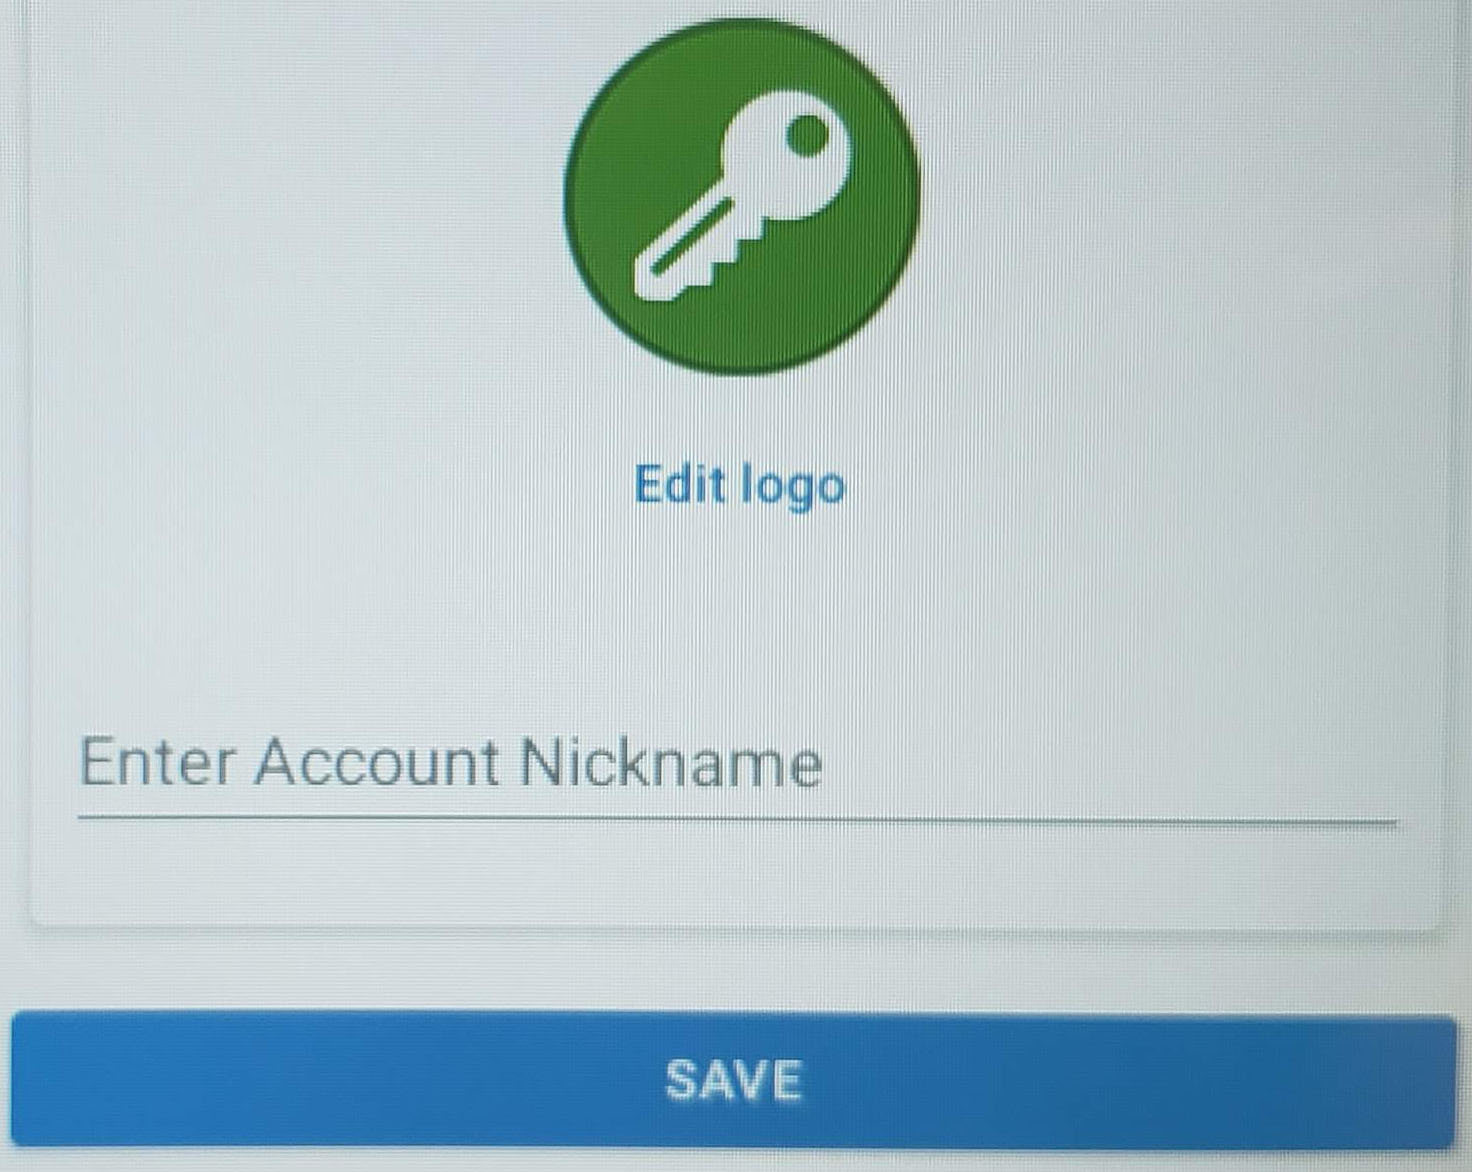
8f. Enter a name for your account. Eg. Infinite Campus.
8g. Click "Save".
8h. You will be taken back to the application list.
9. Using the QR Code.
9a. Click the "Scan QR Code" button.
9b. You may be asked to allow the authenticator to take pictures and record video. Click "Allow".
9c. Position your Chromebook or Phone so the camera is facing the QR code provided in Infinite Campus. If using a Chromebook, this may be most easily done if you fully open the Chromebook so the back of the screen touches the bottom of the Chromebook.
9d. Enter a name for your account. Eg. Infinite Campus.
9e. Click "Save".
9f. You will be taken back to the application list.
10. Once you've setup your account you will see it listed on the initial screen.
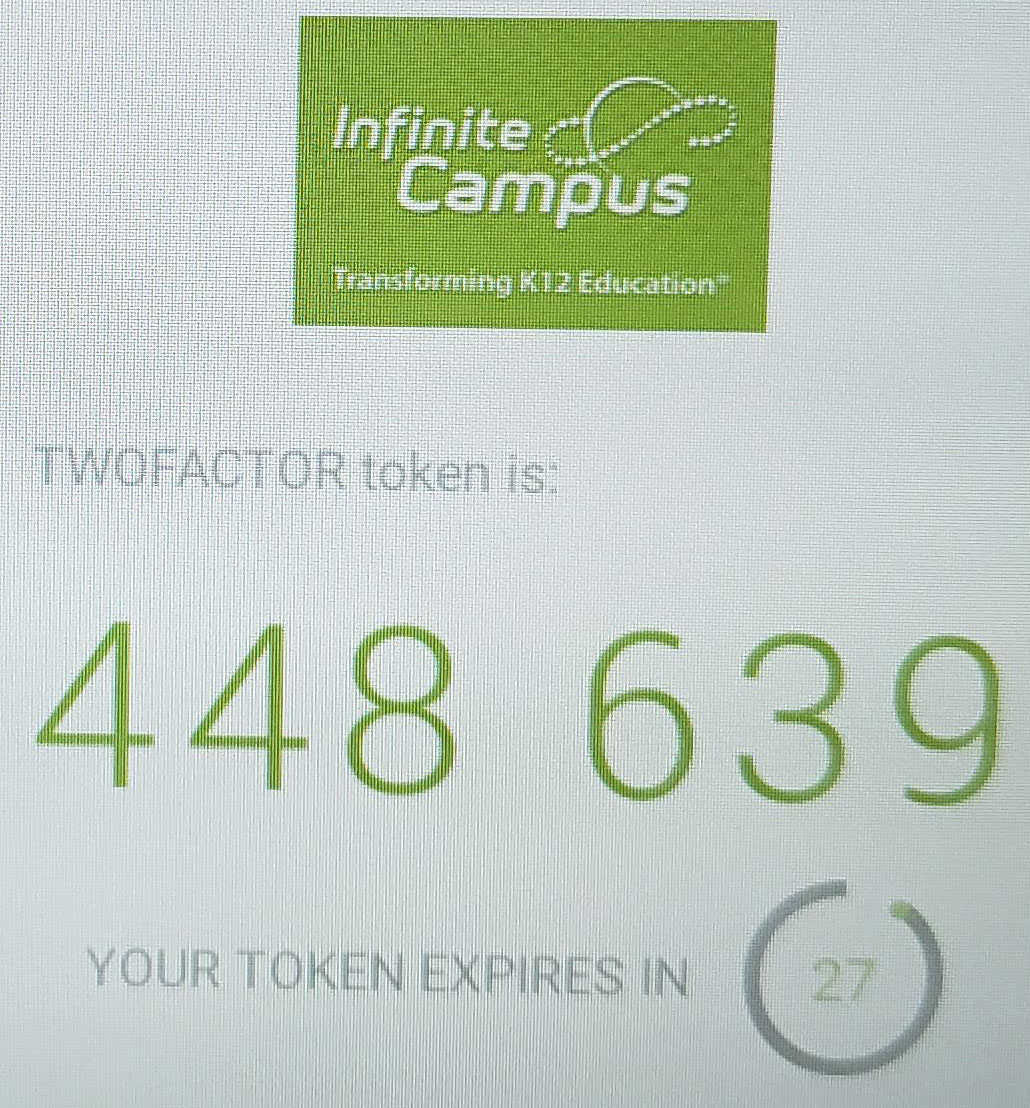
11. Click on the account and you will see a 6 digit number that changes every 30 seconds. The wheel under the number indicates how long until the number changes.
